Showing posts with label byannie. Show all posts

Friday, 10 June 2022

Renaissance Ribbons Bags

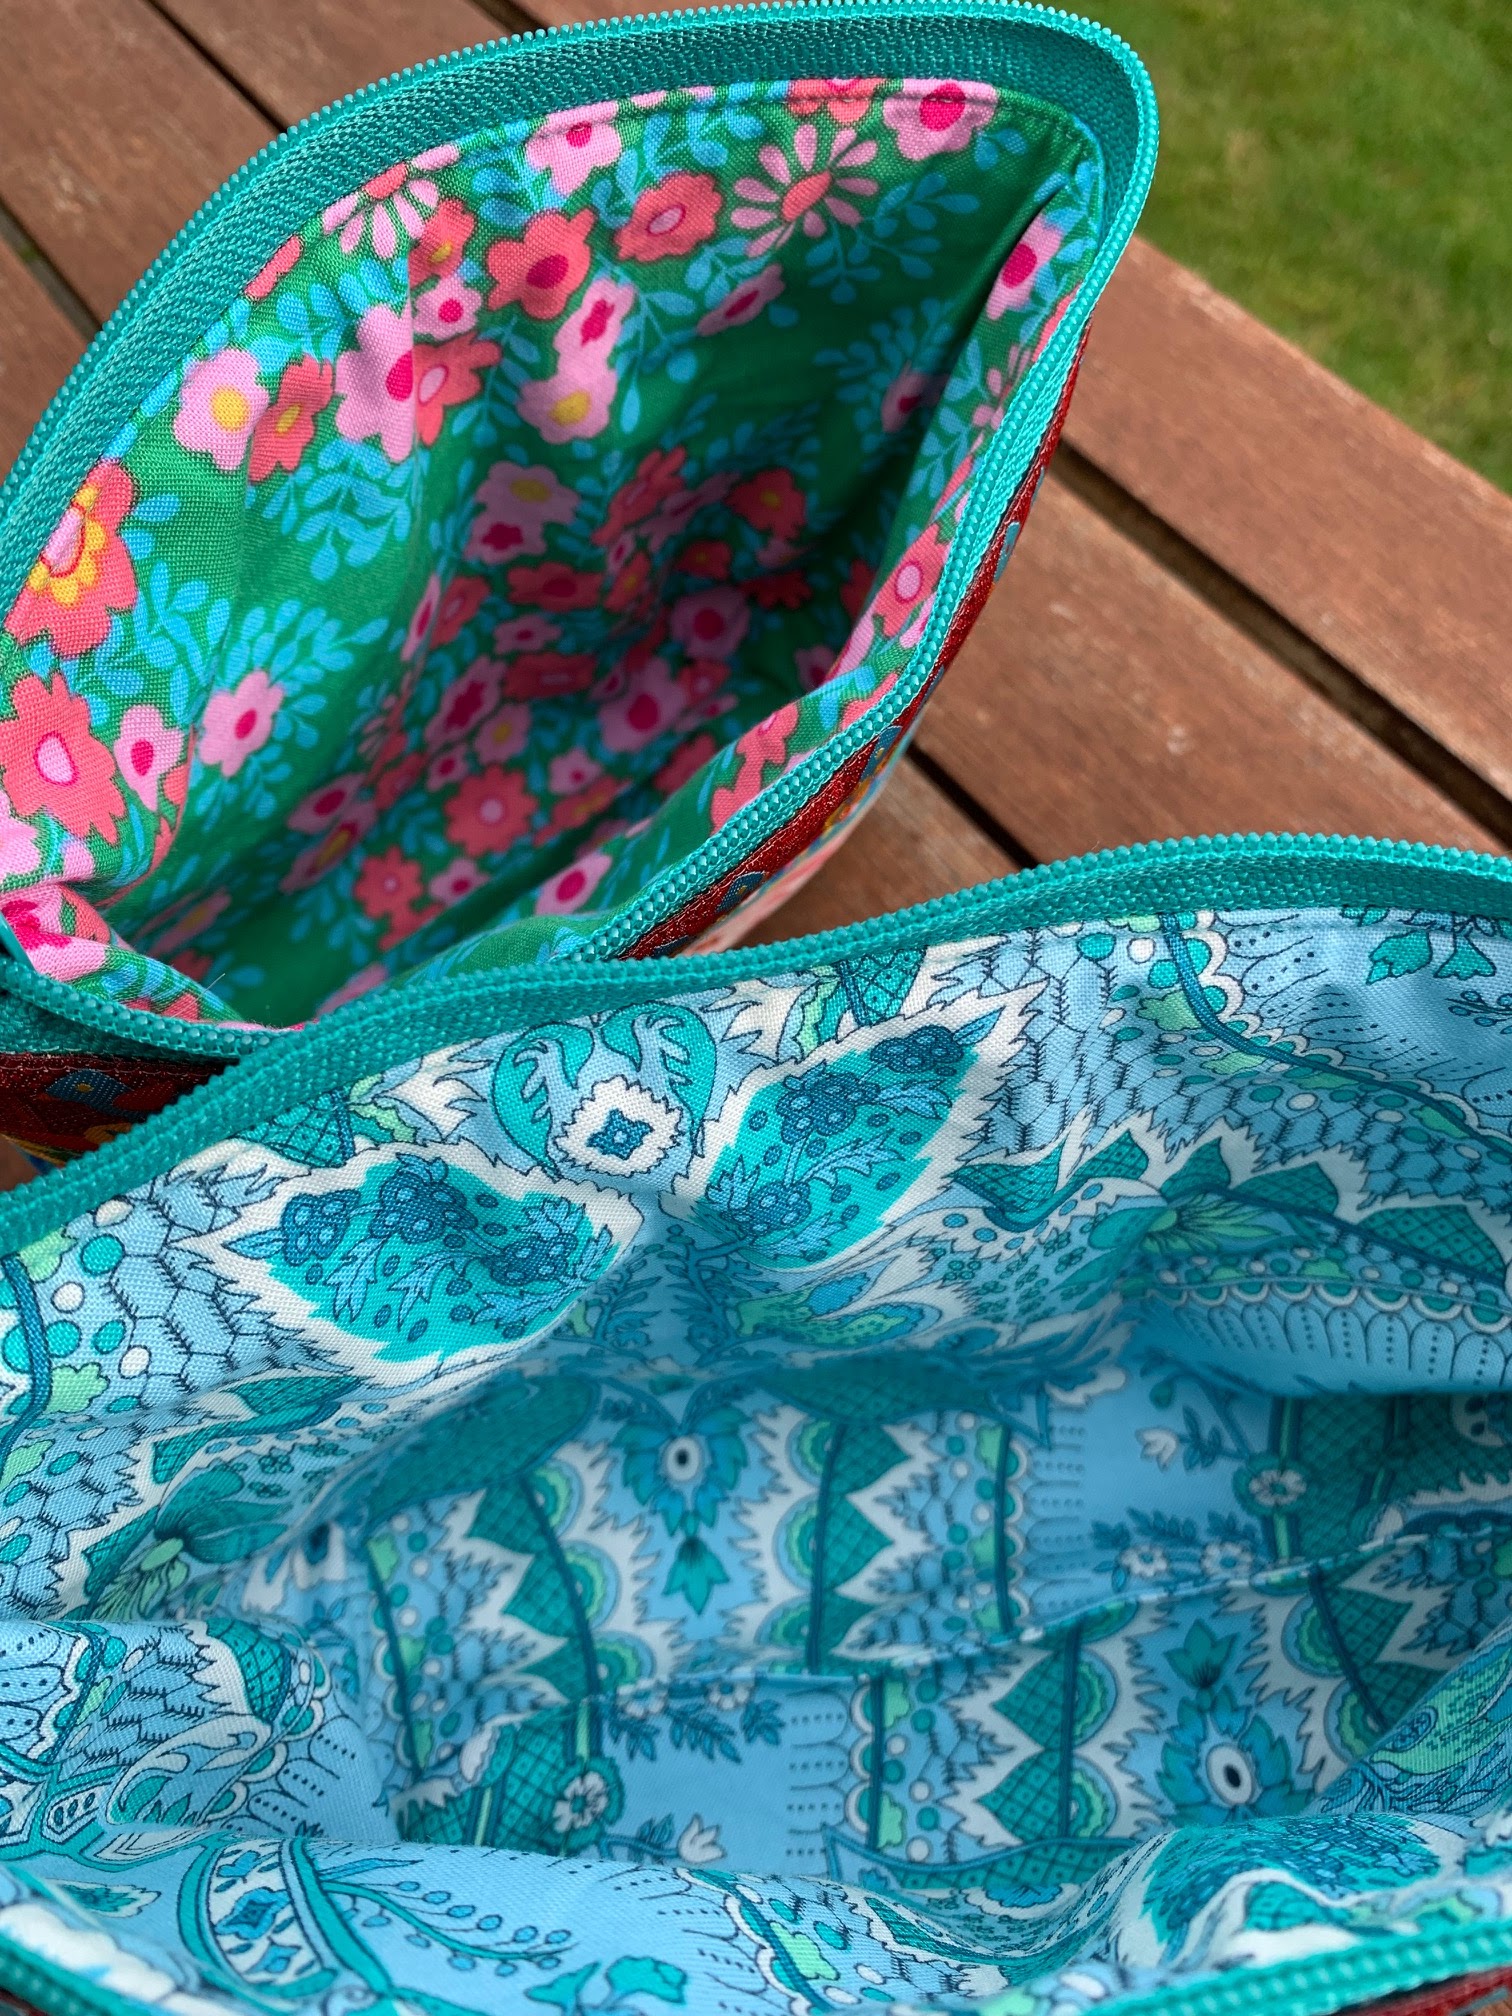
I tried something new this week and made these cute bags with Renaissance Ribbons velvet ribbons.  The lower part of these bags is covered in velvet ribbons - the big flowers on the blue background.


I had seen photos of the velvet ribbons on social media, but when I saw them in person at Stitch Witches in Dunedin I was quite surprised at how luxurious they were.  They colours are very deep and rich, and of course the velvet feels beautiful to touch.  


I couldn't decide which ribbon to buy, so I bought two.  I decided to work with the blue one first, and made two pouches from the accompanying Renaissance Ribbons Bags ByAnnie pattern.  Annie has carefully worked out how to get two pouches out of the 1 metre length of velvet ribbon in each pack.  


I purchased the optional add on video from the ByAnnie website and it was very helpful.  I've made other ByAnnie bags without the videos, but I just couldn't face reading every step of the instructions six times and I thought that the video would make it easier.  It sure did! I just paused the video as I completed each step and happily sewed along with Annie.  


I'm pleased with my bags, but feel that the small one really is quite small.  It doesn't open all the way to the end because the zip end is tucked in. AND, I was disappointed to lose so much of the velvet ribbon across the base of the bigger bag.  I wish I had realised that was going to happen because I would have cut the Soft and Stable bigger, and put quilting fabric across the unseen bottom of the bag. 


So, I decided to change things up with my other ribbon and considered making two bags of equal size.  But then I had another bright idea.......

You'll have to wait until next week to find out about my other idea. 

Now it's time for the Peacock Party.  Feel free to link up a recent blog post below.  


You are invited to the Inlinkz link party!

Click here to enter

Friday, 28 August 2020

Octopus Tote

How cool is my new tote?


I just had to make a bag from the wonderful new Octopus fabric designed by Brandon Mably for Kaffe Fassett Collective.  

I wanted the lining to be from Kaffe Fassett fabrics too, and I was considering using the two fat quarters of black and white Onion Rings that I've got in my stash.  But I've got other plans for them, so I bought Good Vibrations in black in white (on the left above).  But then I thought it might be hard to find "stuff" in the bottom of the bag, so I checked my stash again, and found Labels and Creased in black and white.  

I chose Labels (centre), and I think it works well with the Octopus on the exterior.  


I used a very simple pattern for this bag and make it all in one day.  I love byAnnie's patterns, but I didn't need fancy zips and things on a simple tote.  Instead I modified this tutorial by my friend Adrianne. 

http://www.onthewindyside.co.nz/2014/09/tote-bag-tutorial.html

I still used Annie's Soft and Stable in my bag, because who wants a tote that flops over when you put it down?

So now I have a great tote bag to take when I go out.  I'm really happy with it.


Now it's time for the Peacock Party.  What have you been up to this week?  Feel free to link up a recent blog post below. 


You are invited to the Inlinkz link party!

Click here to enter

Friday, 12 June 2020

Catch All Caddy 2.0

I've got another finished bag to share with you.  

This is the Catch All Caddy 2.0 from Patterns by Annie.


I gave my mum the pattern for Christmas and the fabrics for her bag (Land Art by Odile Bailloeul for Free Spirit Fabrics), shown on the left above.  


Then, after just a few days, it dawned on me that she might make one for me too, so I quilted the panels for my bag before mum went home to Auckland.  She took them with her, and when we went to Auckland a couple of weeks ago she presented me with my finished bag. 


This bag has so many pockets!  I'm looking forward to using it when I go to our guild's retreat next weekend.  I think it will be ideal for storing fat quarters, plus rotary cutters, scissors etc.  

My bag is made with beautiful Art Gallery fabrics from the Legendary collection by Pat Bravo.  I bought them at Material Obsession in Sydney last year.  The bright yellow trim is also by Pat Bravo from her Matchmade range. 

Fortunately I had the perfect Aurifil colour for the machine quilting:


  Mum has decided that her Catch All Caddy is very useful for holding her knitting.


So, were both very happy with our matching Catch All Caddies. 


Now it's time for the Peacock Party.  What have you been up to this week?  Feel free to link up a recent blog post below.  


You are invited to the Inlinkz link party!

Click here to enter

Sunday, 24 March 2019

Bowl Me Over Bag

My Bowl Me Over bag is finished and I love it.


The front


The back

The pattern is Bowl Me Over byAnnie, and the fabrics are Skylark by Margot and Elena for Tokyo Milk - part of Freespirit Fabrics.

I've used the same fabric in two different colourways throughout the bag, with a complementary pink trim for the bindings. I machine quilted the panels with hot pink Aurifil before I started to assemble the bag.


I included the easy access pockets on one side of the interior, but skipped the zipped pocket on the other side of the interior.  I felt it already had enough pockets, and another pocket was just going to add to the bulk I needed to sew through to complete the bag. I used Soft and Stable trhoughout - as recommended in the pattern.

Annie describes this bag as "fun to make".  Mmmm...... stressful to make is possibly more like it! There are a lot of pieces, and if you use a fabric with a directional print you need to take extra care with the cutting.

The instructions are all very clear, but the whole process takes time.  I spent a whole week on this bag, sewing for 3 or 4 hours each day.  Some may say I'm a perfectionist, but I wanted it to be as good as a bought one, so I took it slowly, and took breaks before I made a mistake.

Here are some WIP photos:


The exterior pieces - front and back

The reverse sides of the front and back - the inside of the bag


Preparing to seal the inside seams. I hand sewing the binding down. 

Clover clips to the rescue

So yes, it took time to make this bag, but I'm very happy with the result.  I love these fabrics and this bag pattern is a great way to show them off.


Look out for me and my bag at the Sydney Quilt Show this year!


Thursday, 2 August 2018

Open Wide bag

Well, I finished my quilt for Capital Quilters' exhibition and handed it in last Saturday.  It was a major relief to get it finished in time.  I can't show you a photo yet, but all will be revealed next weekend. 

If you live in NZ, then do try and make it along to our exhibition at the brand new Lower Hutt Events Centre 11-12 August.  It's going to be a great exhibition with 200 quilts, pop up shops, and a cafe!


So, after I'd finished hand quilting my exhibition quilt, I had a great feeling of freedom and knew I could sew anything I wanted to. 


I started by making a small bag from a pattern I'd purchased at the Sydney Quilt Show.  The pattern is called Open Wide, and it's byAnnie. 


I used Annie's Soft and Stable in it so it stands up nicely by itself.  Here's a hint - I sewed together small scraps of Soft and Stable, planning where the folds in the bag would occur. I put the seams on the folds and it works perfectly!


I also used a chunky zip because I've always liked chunky zips.  I skipped the internal pockets because I didn't think I'd use them.


This bag will hold my hand piecing or English paper piecing when I go travelling. I've securely attached my tiny travel scissors so they won't fall on the floor in a plane. 


I know some people run these bags up in an afternoon, but I'm fussy and I like everything to be neat, so I took a bit longer and hand sewed down my bindings.