Showing posts with label bags. Show all posts

Friday, 31 March 2023

Pinestream Quilters

Last night I was the guest speaker at Pinestream Quilters in Upper Hutt, Wellington.  

I've spoken to Pinestream Quilters previously, so I decided to take along some of my bags and tapestry cushions, as well as my most recently finished quilts of course. 


Everyone loved my Giraffe tapestry cushion designed by Kim McLean.  I thought that they were no longer available, but upon checking I see that they are back in stock at the Crewel Gobelin in Sydney here.  You can read more about my cushion and how I attached the tassels here. 


I also talked about bag making and showed some of the bags that I've made myself.  


My modified One Hour Basket made with a Renaissance Ribbons velvet ribbon was very popular.  I've found the velvet ribbon in stock at Bower Bird near Hamilton.  Mel from Bower Bird has two new versions I haven't see before:


Both of them would make beautiful baskets.  I'm getting tempted myself! 


Someone asked about my Pandemic Sampler by Long Dog Samplers and I was horrified to realise this morning that it's been waiting for the back stitching for 11 months now!! I really must get onto that ASAP.  

Thank you Pinestream Quilters - it was a lovely evening spent with like minded quilters. 


Now it's time for the Peacock Party.  Feel free to link up a recent blog post below.  


You are invited to the Inlinkz link party!

Click here to enter


Friday, 13 January 2023

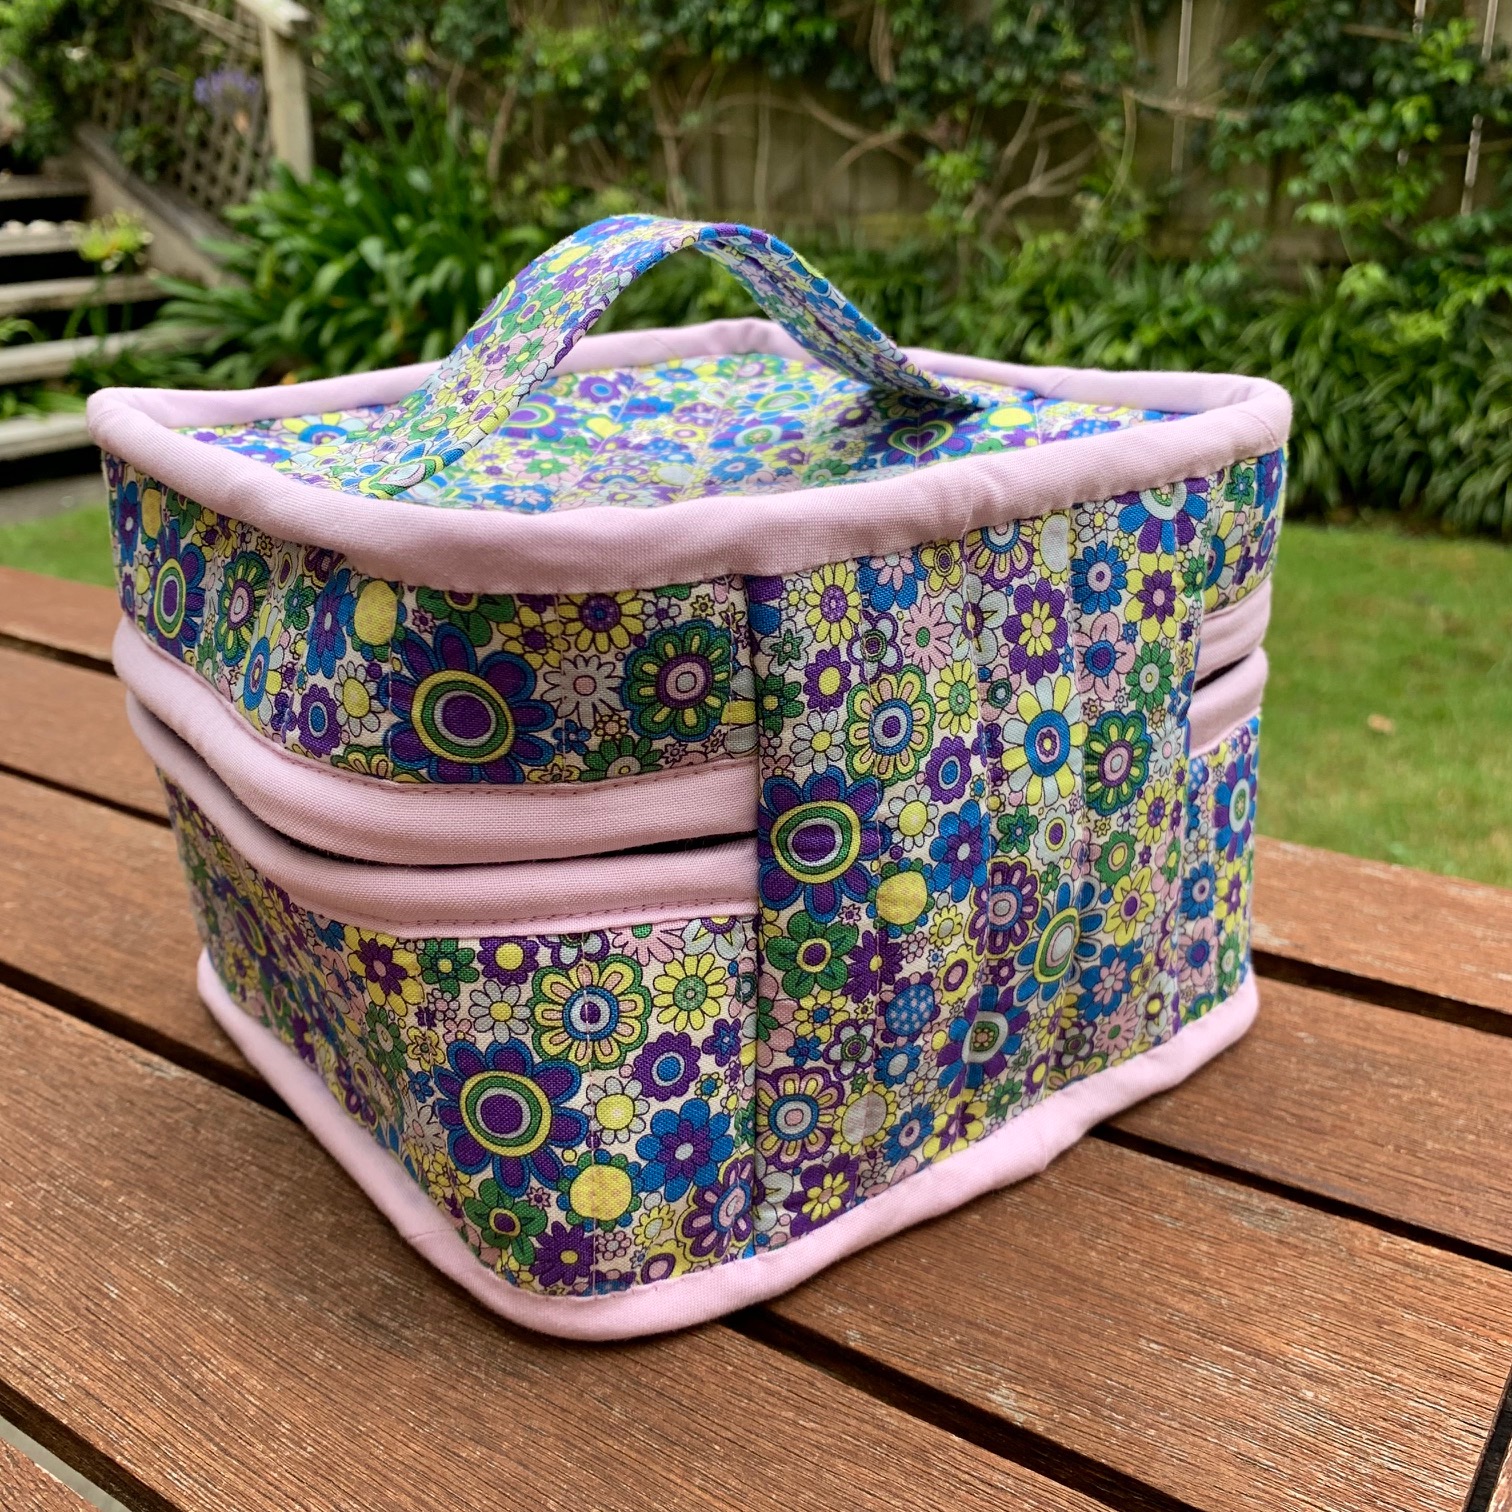
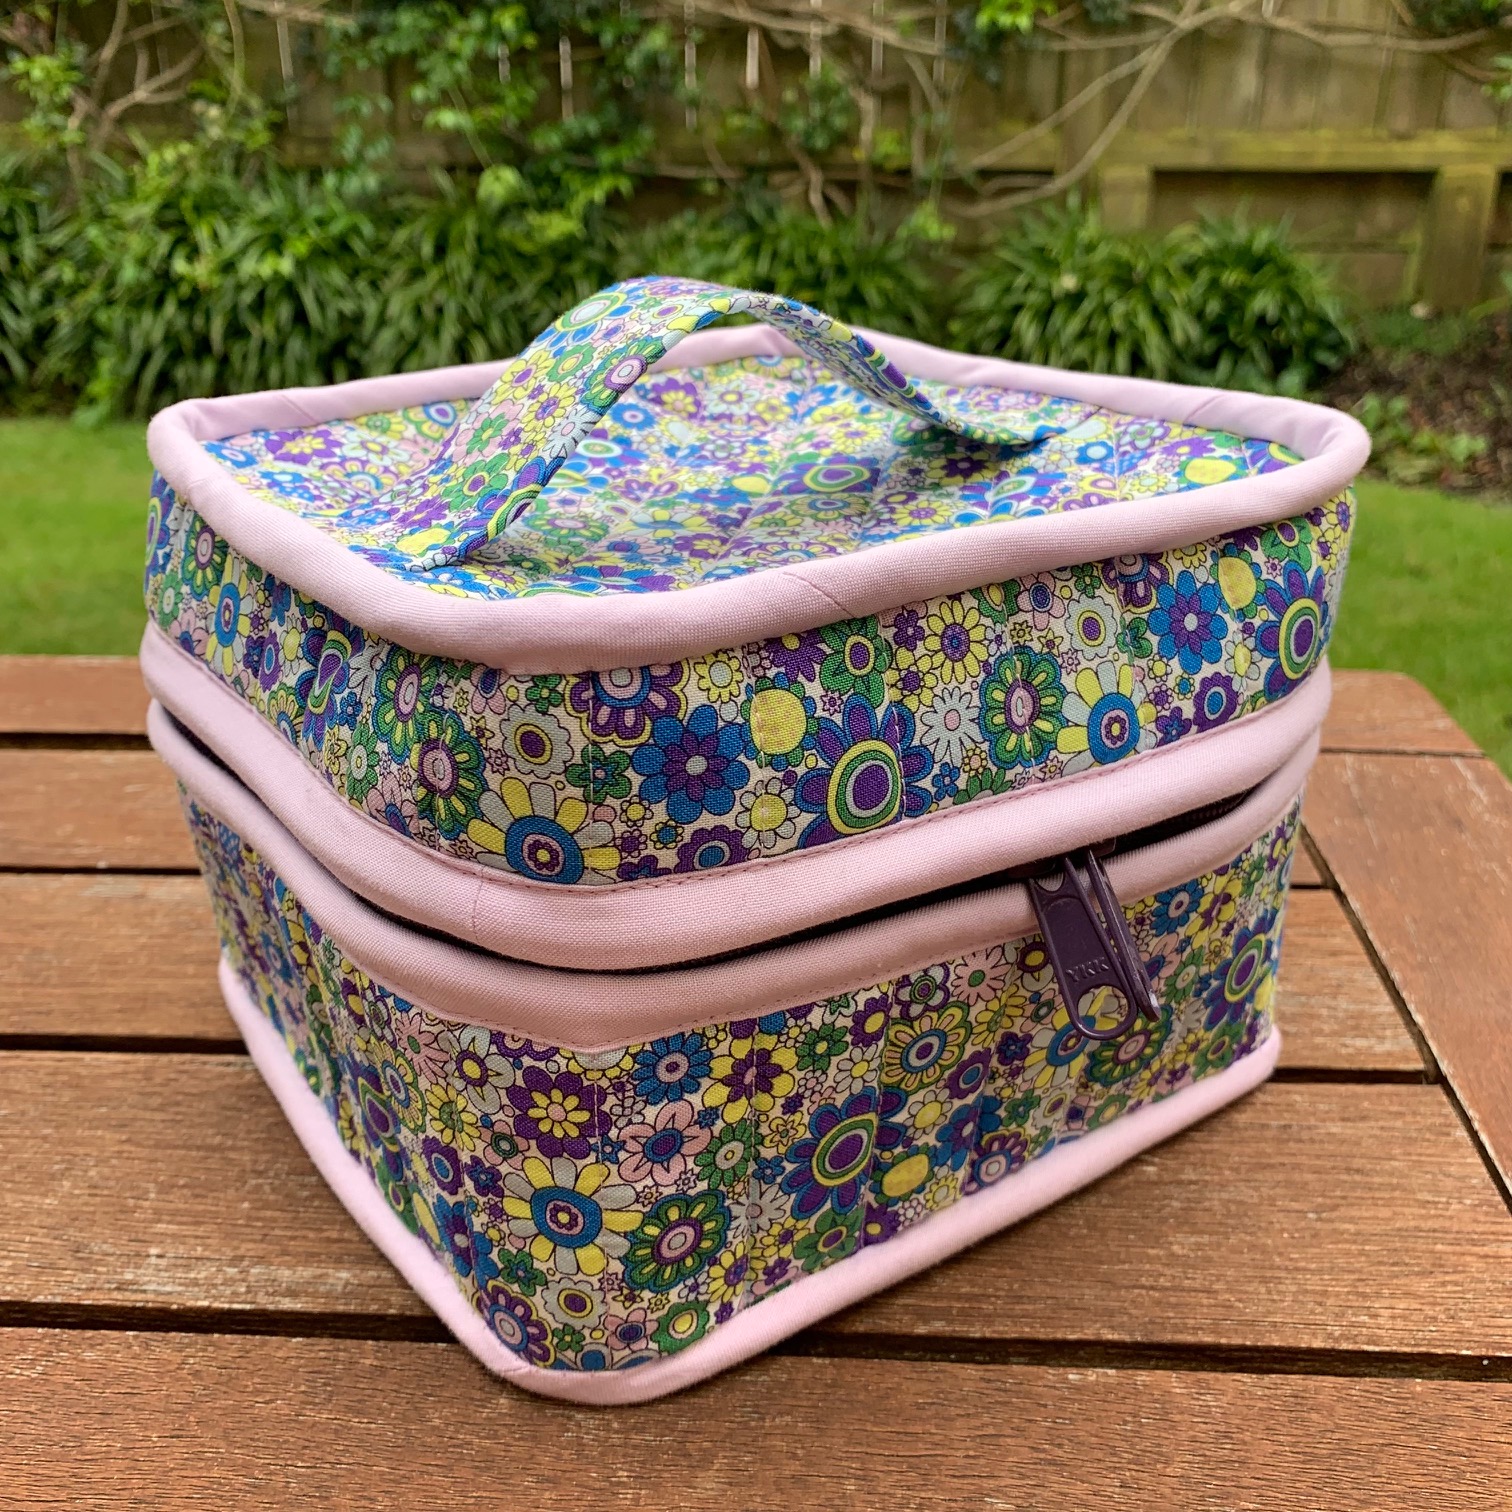
Train Case

My first finish of 2023.


Months ago I saw a beautiful Liberty train case for sale in a shop.  It was pretty pricey, so I decided to make my own version.  

Now I know why it was pricey - they are very fiddly! 

This one ended up bigger than my original plan, but the smaller you go, the more fiddly it gets.  


I ended up using Mink Kim's pattern from Sewing Illustration for Cutie Cube Bag, with quite a few modifications. Mine is sized somewhere between her big and small sizes.  Mine has the binding on the outside rather than the insides.  I used the Patterns by Annie method for binding my seams and zipper edges.  

So it's a hybrid, but it works fine for me and I'm very happy with it.  I won't be making another one in a hurry, and I don't need to, because just last week Shiseido gave me a free one in a gift with purchase deal.  Of course I prefer lavender to red, and the handle on top, but it will still be useful.  


The original Liberty bag that inspired me.  Yes, NZD100 at Ballantynes in Christchurch


https://sewingillustration.com/products/cutie-cube-bag


Now it's time for the Peacock Party.  Feel free to link up a recent blog post below.  

You are invited to the Inlinkz link party!

Friday, 24 June 2022

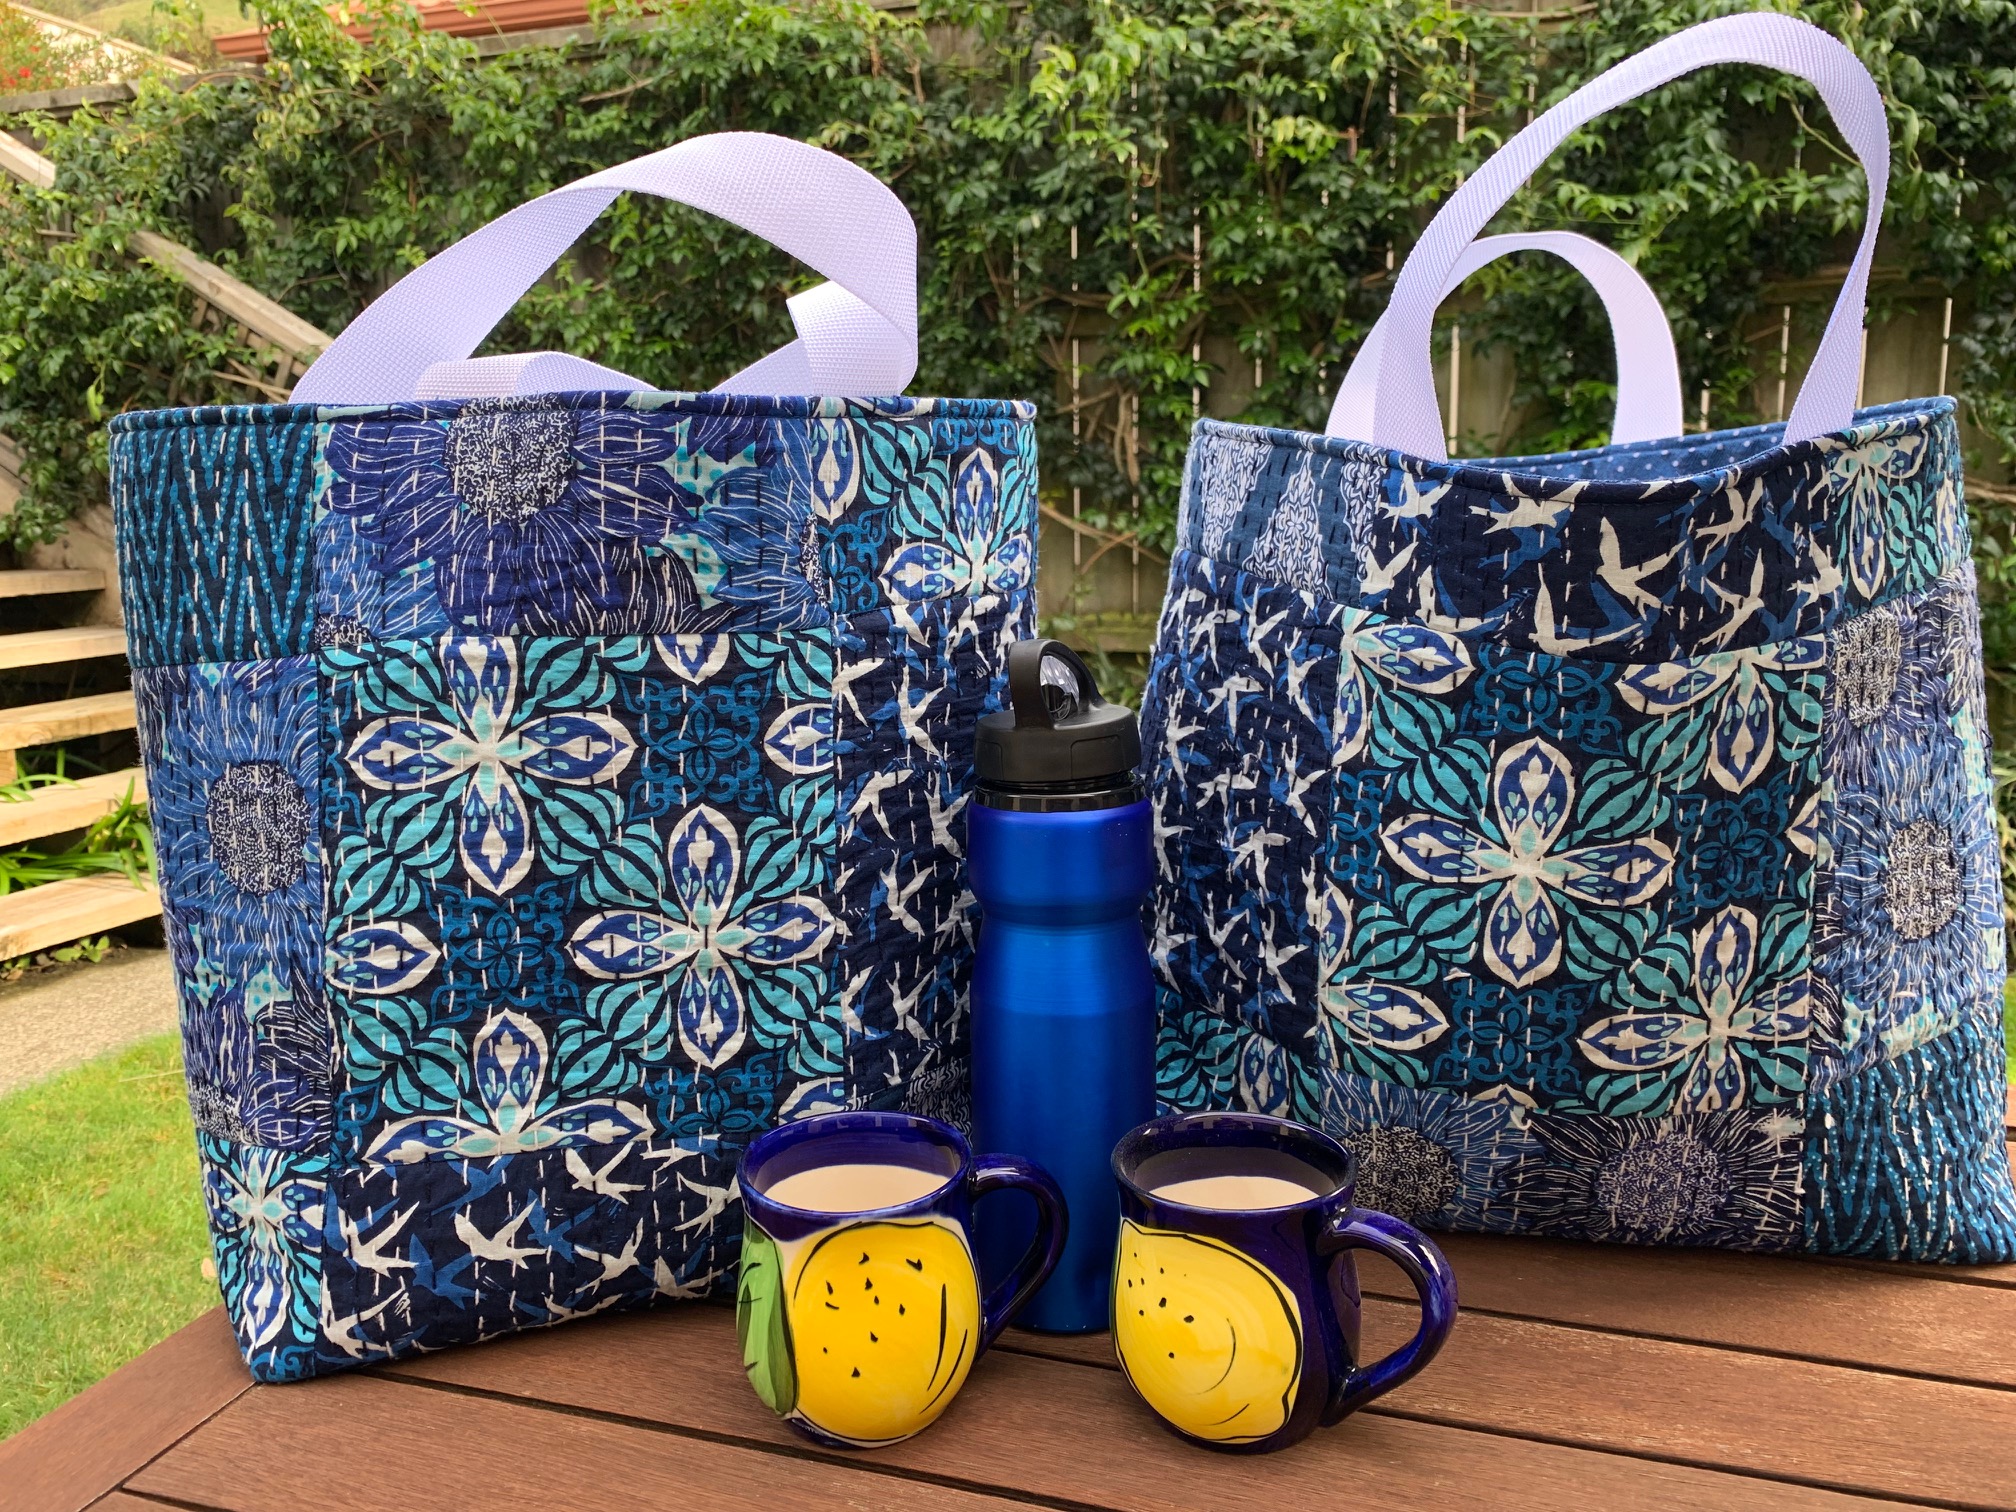
New Tote Bags made from Kantha Cloth

By the time you read this I'll be in Taupo at the Taupo Quiltmakers' "Quilting with the Stars" exhibition.  It's been a while since I've been to a quilt show, so I'm really looking forward to this one.  And I have the honour of being the guest exhibitor this time.  If you see me there please do say "hello".  


In the mean time, I've been busy making some new tote bags.  

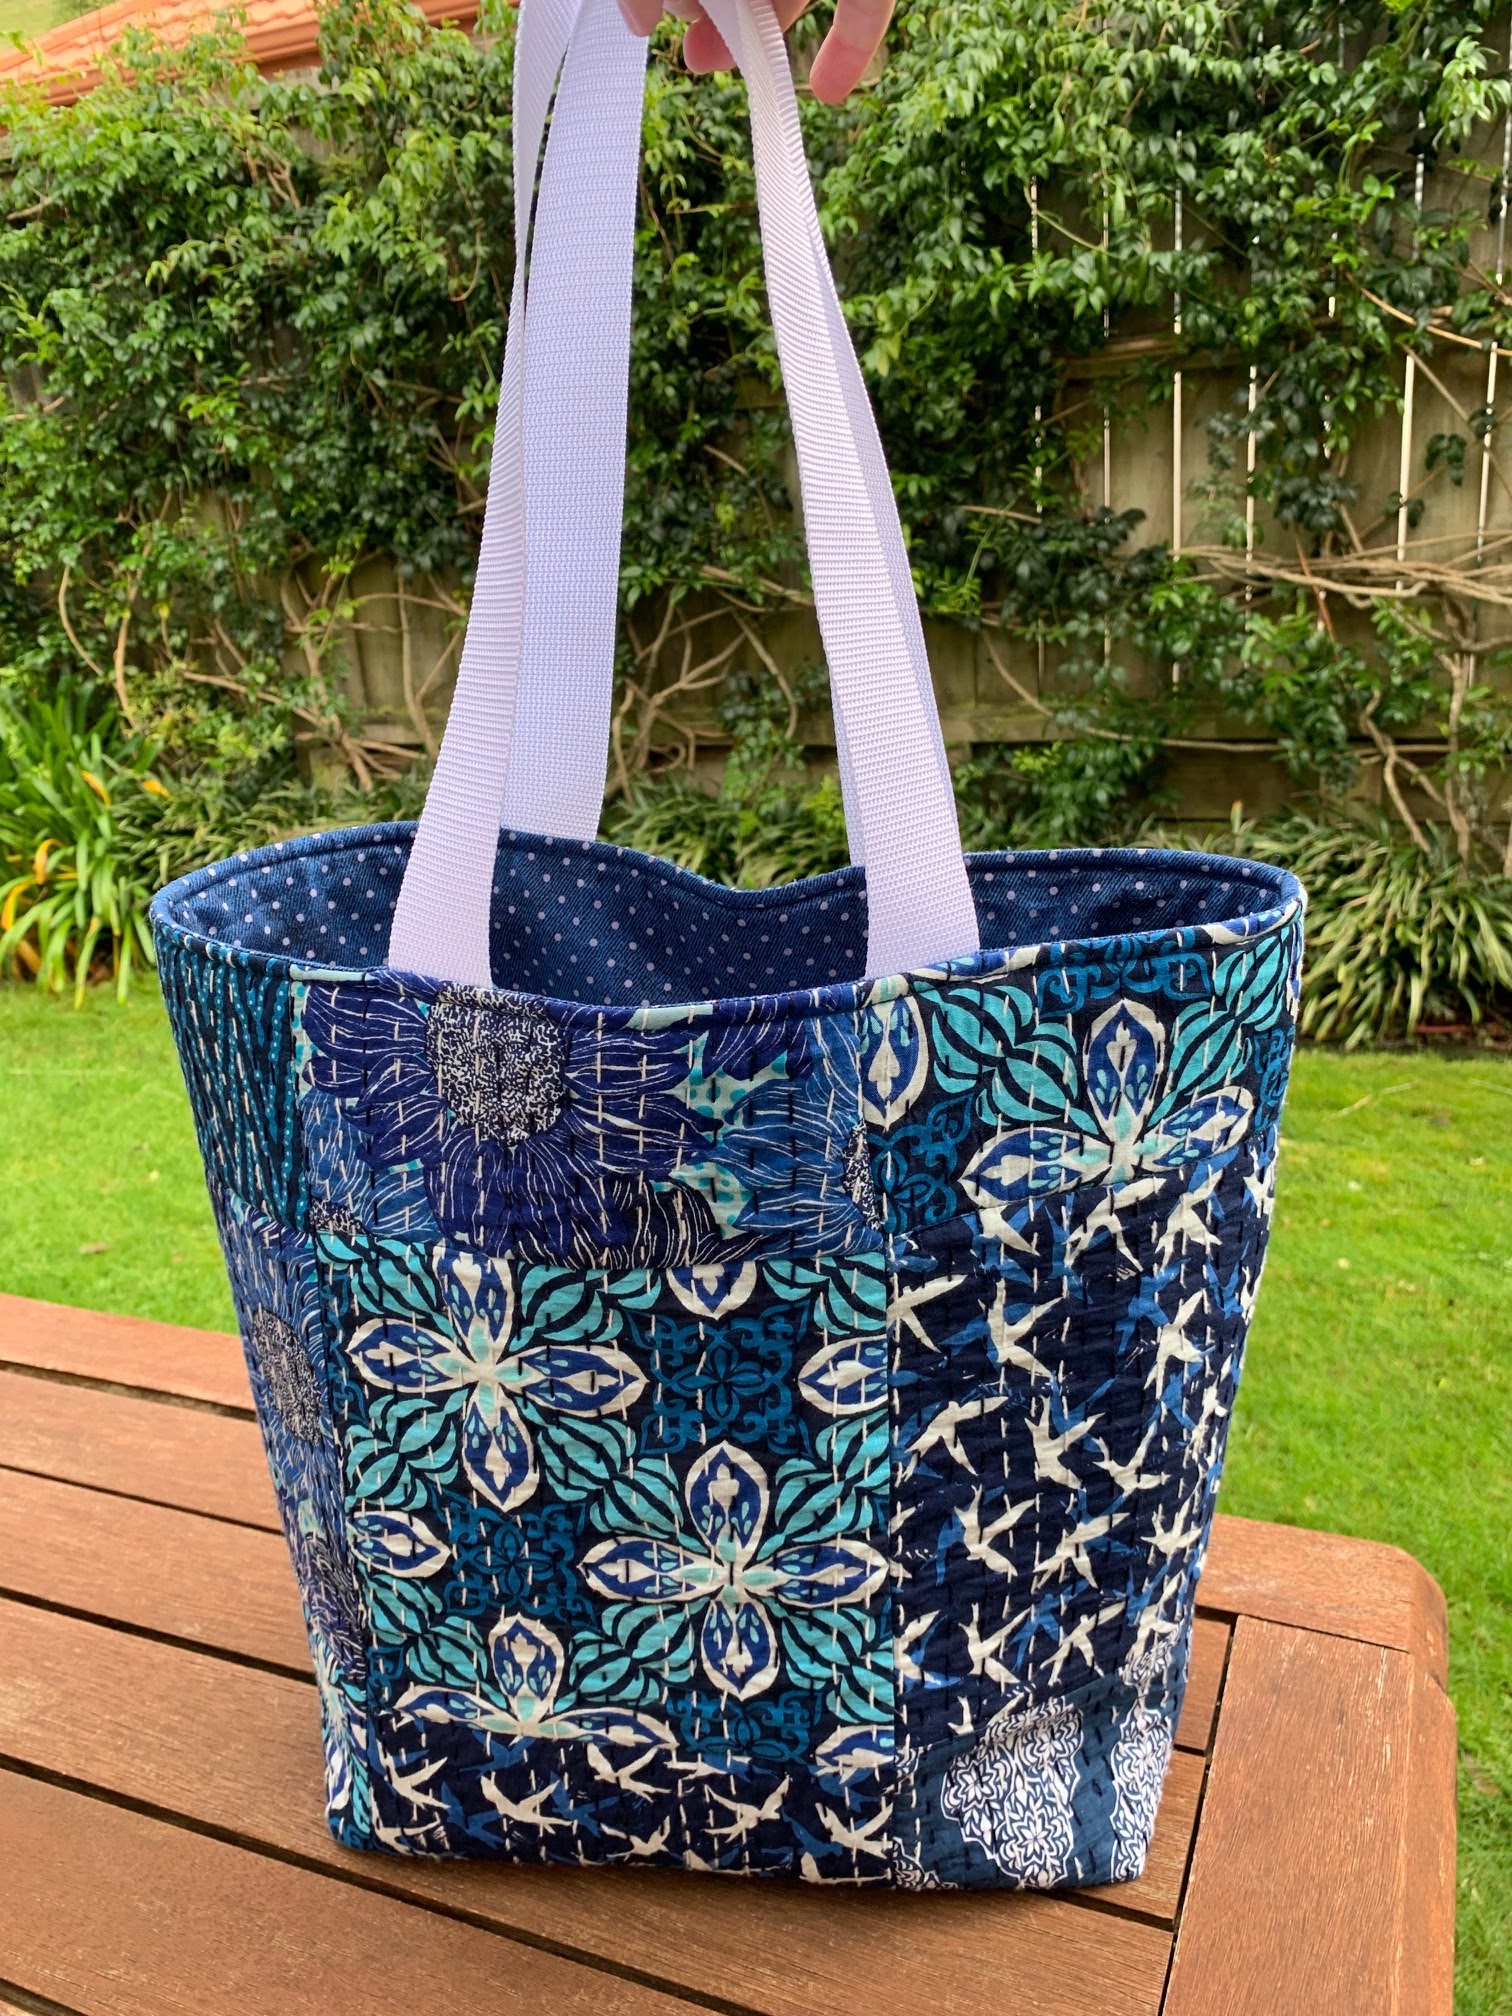
I saw this amazing Kantha cloth designed by Valori Wells at Stitchbird Fabrics in Wellington.  It's not the type of thing you'd cut up into small pieces, so I kept it big and made two large tote bags out of 1 metre.  

I modified and merged two Tote Bag patterns to get the bags the sizes I wanted.  


The second bag isn't as wide, but it is slightly taller.

I originally wanted the stitching on the Kantha cloth to show on the inside too, but that meant I couldn't use Soft and Stable.  And I would have had to bind the seams to give the bag a tidy finish.  I didn't want to do that, so I found some blue fabric that complemented the exterior nicely. And my bags stand up by themselves because they've got Soft and Stable in them.  


Valori Well's Kantha cloth comes in two colour ways - the Indigo that I used, and also Pomegranate. I'm very tempted to go back for some Pomegranate.  


It looks so good.  I love this Kantha cloth and I love my new bags.  


Now it's time for the Peacock Party.  What have you been up to this week? Feel free to link up a recent blog post below:


You are invited to the Inlinkz link party!

Click here to enter

Friday, 1 January 2021

Happy New Year

It's the 1st of January here in New Zealand, so Happy New Year everyone. 

I certainly hope that 2021 is going to be kinder to us all than 2020 was! We won't forget that year in a hurry.  

Here's my first finish of 2021.  Can you guess what it's for?


It's a pouch for my son's new Xbox Series S.  The Series S is a very small, portable Xbox, so my son requested a pouch for it.


He chose the fabrics from my stash - black and white for the outside, a tone on tone black for the interior, and "Xbox green" for the trim.  


The exterior fabric was easy to machine quilt because of the lines on the fabric.

I used the skills I've learnt making bags byAnnie to custom design this bag for the Xbox, and I'm pretty pleased with how it's turned out.  Because it's a small pouch with tight corners, I used two layers of batting rather than Soft and Stable.


I hope you have a happy New Years Day, although I know many parts of the world are going back into lockdown again.  Feel free to link up a recent blog post in the Peacock Party below. 


You are invited to the Inlinkz link party!

Click here to enter

Friday, 29 May 2020

Zip It Up bags

A couple of weeks ago I watched Tula Pink's video launching her new black and white fabric line - Linework (It won't be available for months yet, so don't panic).  Towards the end of the video Tula showed two Zip It Up! bags she had made.  I thought they looked amazing so I dashed off and ordered the pattern from the Ribbon Rose in Auckland.


Here's a link to Tula's video.  The bags appear at about 22 minutes in.

Of course we can't get Linework yet, so I ordered some half yards of Tula's Homemade range for my bag.


I hadn't seen Homemade in real life, but I was very happy with it when it arrived.  I love how green the "Cut Once" fabric is, and I was very impressed that the squares really are 1", just like on my ruler.


I machine quilted the exterior with a pretty pink Aurifil, using a design from Jacqui Gering's Walk book.

A secret pocket on the back

The pattern has a pocket on the front of the outside, and then two pockets on the inside - one mesh and one vinyl.  I didn't like the idea of sewing vinyl on my sewing machine, so I made two mesh pockets, and I changed the exterior pocket from the front to the back.


And then I decided to make a smaller second Zip It Up! bag while I was at it.


The secret pocket on the back

I used a different design from Jacqui Gering's Walk book to quilt the Pokemon fabric. I enjoyed experimenting with different quilting designs.


The selvages on this Pokemon fabric are great, so I decided to incorporate them too.  (The fabric was purchased in Japan some years ago.)


Yes, it's a Gameboy Advance! A Zelda special edition.


So that's my latest experimentation with a Pattern by Annie.  Annie has so many great patterns.  Maybe I'll do a wrap up of all the bags I've made from her patterns in my next post.


What have you been up to this week?  Feel free to link up a recent blog post to the Peacock Party below.
You are invited to the Inlinkz link party!
Click here to enter


Sunday, 24 March 2019

Bowl Me Over Bag

My Bowl Me Over bag is finished and I love it.


The front


The back

The pattern is Bowl Me Over byAnnie, and the fabrics are Skylark by Margot and Elena for Tokyo Milk - part of Freespirit Fabrics.

I've used the same fabric in two different colourways throughout the bag, with a complementary pink trim for the bindings. I machine quilted the panels with hot pink Aurifil before I started to assemble the bag.


I included the easy access pockets on one side of the interior, but skipped the zipped pocket on the other side of the interior.  I felt it already had enough pockets, and another pocket was just going to add to the bulk I needed to sew through to complete the bag. I used Soft and Stable trhoughout - as recommended in the pattern.

Annie describes this bag as "fun to make".  Mmmm...... stressful to make is possibly more like it! There are a lot of pieces, and if you use a fabric with a directional print you need to take extra care with the cutting.

The instructions are all very clear, but the whole process takes time.  I spent a whole week on this bag, sewing for 3 or 4 hours each day.  Some may say I'm a perfectionist, but I wanted it to be as good as a bought one, so I took it slowly, and took breaks before I made a mistake.

Here are some WIP photos:


The exterior pieces - front and back

The reverse sides of the front and back - the inside of the bag


Preparing to seal the inside seams. I hand sewing the binding down. 

Clover clips to the rescue

So yes, it took time to make this bag, but I'm very happy with the result.  I love these fabrics and this bag pattern is a great way to show them off.


Look out for me and my bag at the Sydney Quilt Show this year!