Showing posts with label ballet avec Kaffe Fassett. Show all posts

Friday, 20 August 2021

Ballet with Kaffe = Fireworks

Everyone loves a good fireworks display, so I've decided to call my Ballet with Kaffe quilt, "Fireworks".

Fireworks by Wendy Welsh

I'm so pleased that this quilt is finished.  I love it, but it did take me a few years from start to finish. There were times when I thought I might never finish it. In the end I drew a line on my pattern and decided to stop piecing at that line.


I started this quilt in June 2017, and I finished it in February 2021.  That's almost four years!!!

The Cotton + Steel floral fabric on the left of the photo below was my inspiration fabric.  I didn't use it in the body of the quilt, but I based all of my fabric selections on it, because I love the way that those colours work together.  I used it in the borders of the quilt, and I managed to secure enough to use it on the back too. 


Sharon Burgess of Lilabelle Lane, Willyne Hammerstein and me - AQC in Melbourne 2018

Along the way I attended a class with Willyne Hammerstein at the Australian Quilt Convention (AQC) in Melbourne.  Willyne made hand piecing look so easy, but I'd already started English Paper Piecing (EPP) my Ballet quilt, and I didn't want to mix the methods, so I persevered with EPP. 

At the Great NZ Quilt Show in Rotorua May 2021

I finished the English Paper Piecing in January 2020, and then in April 2020 I added the fancy borders, inspired by the borders around Willyne's Moncarapacho quilt from Book 3, pictured below. 

Moncarapacho designed and made by Willyne Hammerstein

I do love hand quilting, and I wanted this quilt to be all my own work, so I hand quilted it with Aurifil 28wt in a range of different colours.  I enjoyed revisiting all the fabrics in my quilt as I hand quilted it.


You can read all of my previous posts about this quilt on the Ballet with Kaffe Fassett tab at the top of my blog, or by clicking here.  

I was going to say: IF you live in Wellington, and IF we're back at Level 1 by next Saturday 28 August, you can come and see it in person at Capital Quilters guild meeting.  But that's looking very unlikely now. I think we will have to reschedule my talk to Capital Quilters. 
Or maybe you could see it at Rose City Quilters on 25 October 2021. 

Finished size: 60"w x 66"h


Now it's time for the Peacock Party.  Feel free to link up a recent blog post below. 


You are invited to the Inlinkz link party!

Click here to enter

Friday, 6 November 2020

Guy Fawkes Night


Last week was Halloween, this week it's Guy Fawkes.  

Guy Fawkes was a much bigger deal than Halloween in New Zealand when I was growing up.  Most families bought their own fireworks and let off some sky rockets, Catherine wheels, flower pots, and double happys in the back yard.  Sparklers were just for little kids!


Then sales of fireworks to the public became restricted, and city councils started putting on large displays at public venues.  In Wellington they used to put a barge in the harbour and let off massive fireworks for about 15 minutes.  However, because it's Spring here, and the days are getting longer, we had to wait until 9.15pm for it to get really dark before the show could start.  

Sadly it looks like it's going to rain tonight so there won't be many fireworks going off.  


My Ballet with Kaffe quilt from Millefiori Quilts 2 reminds me of fireworks and Guy Fawkes night.  The rosettes look like those giant exploding fireworks you see at major events.  You can read more about how I made this quilt on the tab at the top of the page, or by clicking here.  

I'm getting ready to start hand quilting this quilt soon.  It's been basted for months, but I've been working on other things.  Hopefully it will get an outing in 2021, so I better start hand quilting before Christmas. 

If you're a Kiwi, remember that pre-registration for Symposium 2022 opens tomorrow, Saturday 7 November at 9am.  Pre-registration is important because class allocations are based on pre-registration numbers.  The lower your number, the higher your priority in the class allocations.  Check out www.quiltsymposium2022.co.nz for all the details. 


  Now it's time for the Peacock Party.  What have you been up to this week? Feel free to link up a recent blog post below. 


You are invited to the Inlinkz link party!

Click here to enter

Sunday, 5 April 2020

Ballet with Kaffe - How I attached the borders

My quilt top is finished!! And I love it. 

I always knew that I wanted to include my inspiration fabric somewhere in my Ballet with Kaffe quilt.


I had intended to use it for the borders, but then I realised that the pattern repeat was quite obvious, and the repeating motifs would stand out on the borders.  So I decided to piece my borders and allowed snippets of my inspiration fabric to peek through.


 I knew that Willyne Hammerstein had pieced the borders on her Moncarapacho quilt, so I followed her method set out in Millefiori Quilts book 3.

Moncarapacho by Willyne Hammerstein

I used the same measurements as Willyne, but instead of making a crazy patchwork strip, I used my inspiration fabric.

1.  Piecing the borders

I decided to foundation paper piece the borders for accuracy.  I created a template on my computer and printed off lots of copies.


When I foundation paper piece like this, I sew multiple strips at once.  I sew one piece on to each of many strips, and then I get up and press them all, and return to add another piece to all of the strips.


I kept making strips and joining them until I had enough to make the 4 borders.


I made sure that each border was the length of the edge, plus the width of the border times 2, plus a bit more for good measure.  I did this because I knew that I wanted to mitre the corners.

Preparing to mitre the corners

2. Attaching the borders

I know this bit is stressful.  I spent more than two years English Paper Piecing my quilt top, and I didn't want it to unravel.  When I attached the borders to my la passacaglia quilt (click here to see) I left the paper pieces in the edge row, but this time I took them out first.  I had learnt from my la passacaglia experience, and as I had sewn the edge pieces on my Ballet quilt, I had taken extra care to secure the threads so the seams wouldn't unravel.  

I took the final paper pieces out of the edge pieces of my quilt, and pressed all the seam allowances open. (As for the rest of the quilt, I just pressed from the front - it's impossible to get all of these seam allowances sitting neatly.) 


Then I lay my quilt top on top of the border.
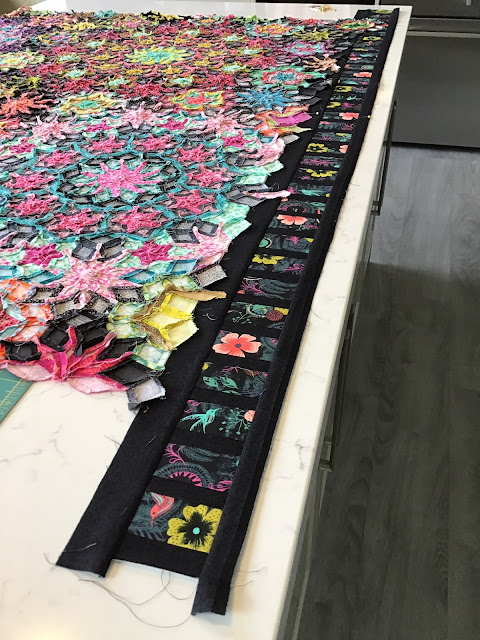
ready to bring the quilt top over the border

Based on the diagrams in the book, I knew which pieces would align with the border's edge, so I pinned those pieces into place first.  Then I added more pins so it wouldn't move during sewing. I used a lot of pins!


I sewed the border on with the border facing me so I could stitch an even 1/4" seam. I didn't worry about which way the seam allowances were sitting underneath.


I checked on the front that the seam was straight and where I wanted it to be.  I only trimmed away the excess quilt top once I had stitched the border on and checked the seam position. Trimming was the final step of stage 2 - Attaching the Borders.


3.  Mitring the corners

It's been a long time since I've mitred corners, but it's definitely easier the second time around.  There are plenty of tutorials about mitring corners, but I'll just show a few photos of what I did.  If you haven't done it before, I suggest you consult a full tutorial before you try this.

I folded the quilt right sides together so the borders lay on top of each other

I lay the ruler along the folded edge of the quilt (bottom left in photo),
with the 45 degree line on the edge of the border. (where my pen is).
Then I drew a stitching line across the bottom of the ruler.  

The stitching line pinned and ready to sew.
I sewed along the marked line.

After I'd sewn the seam and checked it from the front, I trimmed off the excess borders 1/4" from the seam.

Look at that!!! It's perfect.  I know that the windows don't match up, but that was very unlikely given the design of the borders.  I don't mind because the borders are very dark and it won't be very obvious.  


Then I hand stitched the corners closed where the machine stitching finished before the corners.

Hand stitching the corners closed.

Finally I took the foundation paper pieces out.  I left them in all this time to stabilise the borders and prevent stretching.


So there you have it.

I know it sounds like a lot of effort, but I love the result so it's totally worth it to me.  I do intend to hand quilt my Ballet with Kaffe quilt, but I'm going to take a little break and work on some other things first.

You can find my other posts about my Millefiori Quilts on the tabs at the top of my blog:

la Passacaglia

Ballet with Kaffe 


Friday, 3 January 2020

Ballet with Kaffe top is finished (and the Peacock Party)

I'm thrilled to say that I finished piecing my Ballet with Kaffe quilt on New Year's Day.


It still needs borders, but I was so happy to finally finish the English Paper Piecing. My inspiration fabric will certainly feature in the borders, and I do hope that I've got enough to use it as the backing too.

Inspiration fabric is on the right.

In the final few days I had to swap out some rosettes that I'd previously sewed in.  I hate doing that, but when the colours are wrong, they are just wrong and those rosettes just have to go. 

I didn't like the colour of the star circled in the picture below.  It looked too similar to the 10 pointed stars circling the big rosette on the right.


So I unpicked it and replaced it with the star shown below in the centre of the photo.  This new fabric hints at the mustard colour used in the big rosette on the right, but isn't as dominant as the aqua was.


I've surprised myself with how far I've come since I pulled this quilt out on 8 December.  In three and a half weeks I finished something that has sat in the cupboard for the last 10 months.  Why didn't I do it sooner?

as at 9 December 2019

I do think the motivation of seeing Millefiori Quilts Book 4 has certainly helped.  I still don't know of any copies of Willyne Hammerstein's new book for sale in New Zealand, but it will get here eventually.

If you'd like to know more about Ballet with Kaffe, you can read ALL my posts on the tab at the top of my blog, or by clicking here.


What have you been up to lately? Have you been sewing up a storm over the Christmas / New Year period?  Feel free to link up below and show us all what you've been doing - holidays or sewing.


You are invited to the Inlinkz link party!
Click here to enter


Friday, 13 December 2019

Ballet with Kaffe revisited (and the Peacock Party)

My poor Ballet with Kaffe quilt has been neglected for months.  So many other tempting things have come along this year, so I put this one away and haven't done anything on it since February.


However, Quiltmania have just started advertising Willyne Hammerstein's fourth book, Millefiori Quilts 4 and that has spurred me into action.


Of course I want the new book, and I probably want to make quilts from it, so I really need to finish my Ballet with Kaffe from book 2. I've worked on it every night this week with no distractions.  That's pretty good for me!


You can read more about this quilt on the Ballet with Kaffe - Millefiori Quilts 2 tab at the top of the page or by clicking here.


Now it's time for the Peacock Party.
What have you been up to this week? Have you had any time for quilting or stitching? Or are you busy preparing for Christmas?


You are invited to the Inlinkz link party!
Click here to enter


Wednesday, 6 February 2019

Millefiori Quilts 2 - Ballet with Kaffe Fassett

I've been working on my Ballet with Kaffe quilt recently.  This quilt didn't see a lot of action in 2018, but I'm certainly giving it all my attention now.  I'd really like to finish it this year. 


The pattern is called "Ballet with Kaffe Fassett" from Millefiori Quilts 2 by Willyne Hammerstein.  It's the quilt shown on the cover of the book above.  My inspiration fabric is the one on the left by Cotton + Steel.  I'm trying to keep the the colours used in that fabric because I love how they look together. 


I'm English Paper Piecing my quilt, but it can also be hand stitched with a running stitch. I glue baste my pieces with a glue stick from SewLine or Sue Daley.


Last year I made four of the largest rosettes, so this year I've been working on the filler pieces and trying to join the rosettes up. This represents two thirds of the quilt.


I spend a lot of time planning my rosettes and trying to get the colour balance correct.  As I've said before, I hate unpicking English Paper Piecing, so I only sew a rosette in once I'm really sure of it's placement.  I leave the fabrics on the floor for a few days before I even cut the pieces out.


I think about the colour placement while I watch TV at night. 


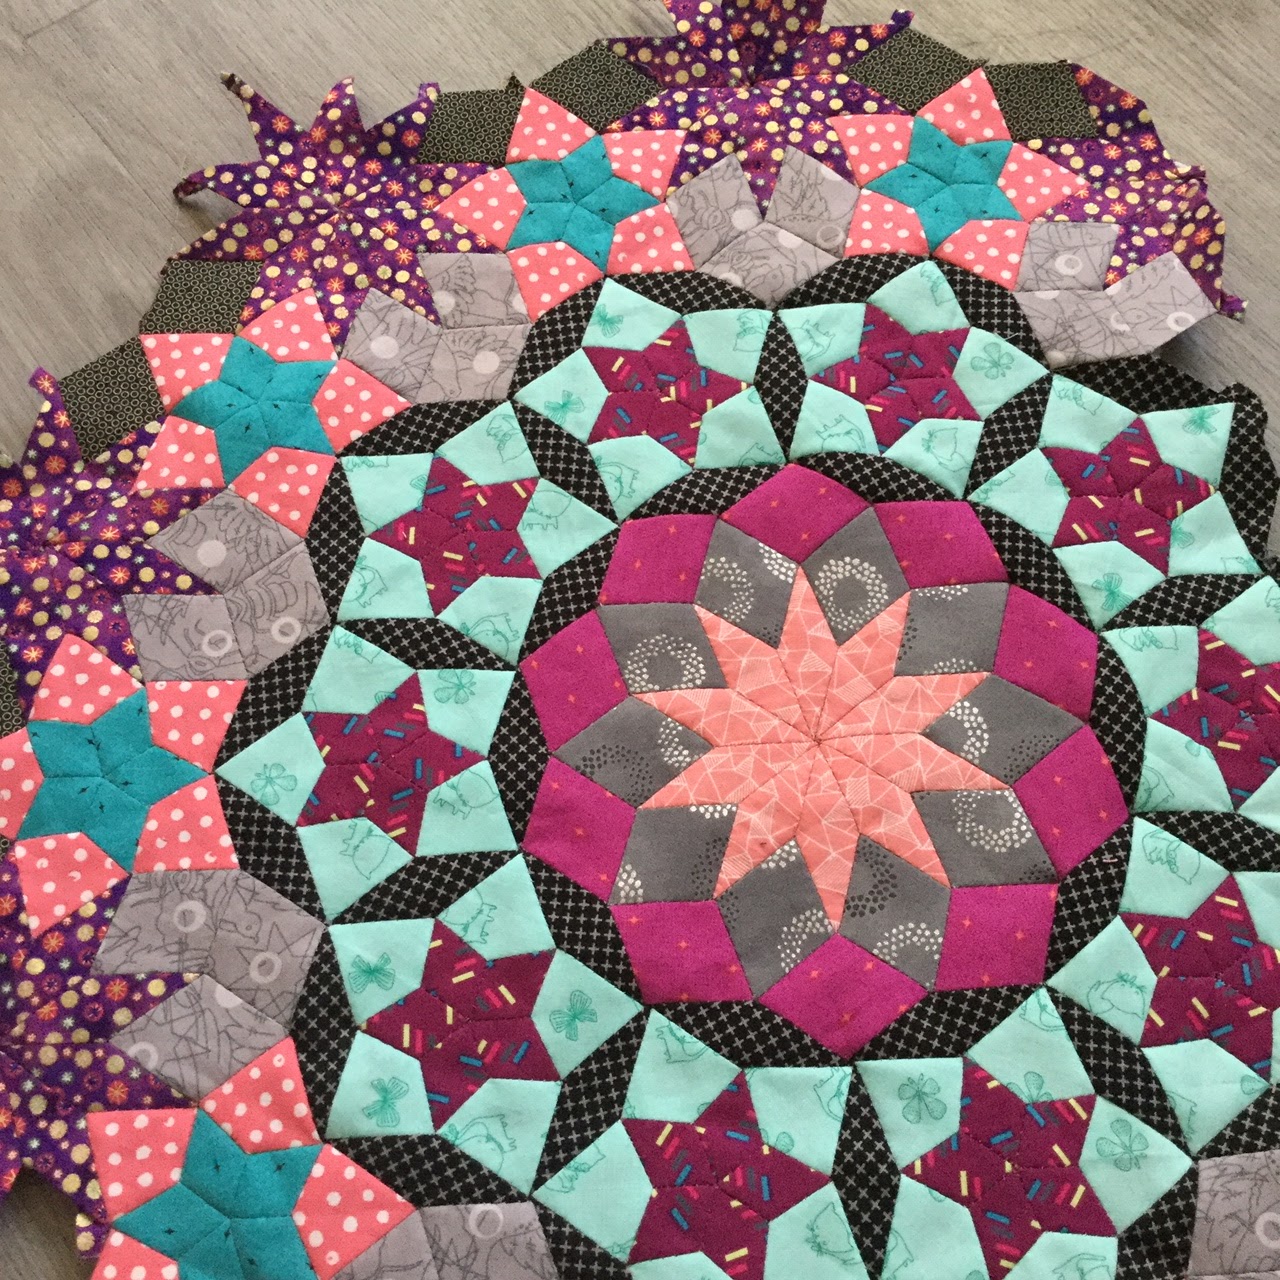
This pattern really is very complex.  It's even harder than la passacaglia! and I'm not the only one to say that.  It's hard to get the points of the 10 pointed stars meeting nicely in the centre.  And the rosettes merge into each other more than they did in la passacaglia.  Anyway, I've come this far, so I am going to finish this quilt, and hopefully that will happen in 2019 because Willyne has a new book coming out in 2020 and I want to be ready for that!

You can find all of my other posts about this quilt on the tab just under the header photo, or by clicking here.