Showing posts with label EPP. Show all posts

Friday, 18 September 2020

Is it Summer yet?

 This week I had a little play with English Paper Piecing.  


I've had these gorgeous ice cream prints for a few months now, and I decided I would just start playing around with them and see where it leads me.  I cut and basted some other combinations while I was at it.


I don't have a master plan yet, I'm just going to experiment with them.  That's why I chose to do English Paper Piecing rather than hand piecing.  These blocks could be floating around for a while, and they will keep better with the raw edges glue basted down.  


There's lots of pretty fabrics in this range by Melody Millar for Ruby Star Society.  I was never a huge Cotton + Steel fan, but I thought these fabrics were quite different and I could use them in many ways.  

I haven't done much sewing done this week because I went to Queenstown for four nights.  If you follow me on Instagram or Facebook you've probably seen too many photos already, but for those who don't, here are a few snaps of Queenstown in late winter / early Spring.  

The Remarkables


Skyline Gondoals


Gibbston Valley winery


Waking up to snow on Cecil Peak

We had a wonderful time in Queenstown.  The town was very quiet because our borders are closed until there is a vaccine, so there were no international tourists.  We are allowed to travel domestically provided we wear masks on public transport including planes.  


I flew in style with my new Octopus tote bag.  


Now it's time for the Peacock Party.  What have you been up to this week? Feel free to link up a recent blog post below.


You are invited to the Inlinkz link party!

Click here to enter

Sunday, 5 April 2020

Ballet with Kaffe - How I attached the borders

My quilt top is finished!! And I love it. 

I always knew that I wanted to include my inspiration fabric somewhere in my Ballet with Kaffe quilt.


I had intended to use it for the borders, but then I realised that the pattern repeat was quite obvious, and the repeating motifs would stand out on the borders.  So I decided to piece my borders and allowed snippets of my inspiration fabric to peek through.


 I knew that Willyne Hammerstein had pieced the borders on her Moncarapacho quilt, so I followed her method set out in Millefiori Quilts book 3.

Moncarapacho by Willyne Hammerstein

I used the same measurements as Willyne, but instead of making a crazy patchwork strip, I used my inspiration fabric.

1.  Piecing the borders

I decided to foundation paper piece the borders for accuracy.  I created a template on my computer and printed off lots of copies.


When I foundation paper piece like this, I sew multiple strips at once.  I sew one piece on to each of many strips, and then I get up and press them all, and return to add another piece to all of the strips.


I kept making strips and joining them until I had enough to make the 4 borders.


I made sure that each border was the length of the edge, plus the width of the border times 2, plus a bit more for good measure.  I did this because I knew that I wanted to mitre the corners.

Preparing to mitre the corners

2. Attaching the borders

I know this bit is stressful.  I spent more than two years English Paper Piecing my quilt top, and I didn't want it to unravel.  When I attached the borders to my la passacaglia quilt (click here to see) I left the paper pieces in the edge row, but this time I took them out first.  I had learnt from my la passacaglia experience, and as I had sewn the edge pieces on my Ballet quilt, I had taken extra care to secure the threads so the seams wouldn't unravel.  

I took the final paper pieces out of the edge pieces of my quilt, and pressed all the seam allowances open. (As for the rest of the quilt, I just pressed from the front - it's impossible to get all of these seam allowances sitting neatly.) 


Then I lay my quilt top on top of the border.
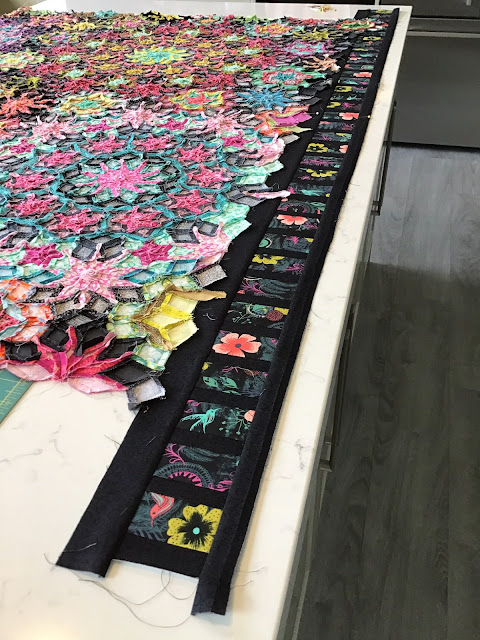
ready to bring the quilt top over the border

Based on the diagrams in the book, I knew which pieces would align with the border's edge, so I pinned those pieces into place first.  Then I added more pins so it wouldn't move during sewing. I used a lot of pins!


I sewed the border on with the border facing me so I could stitch an even 1/4" seam. I didn't worry about which way the seam allowances were sitting underneath.


I checked on the front that the seam was straight and where I wanted it to be.  I only trimmed away the excess quilt top once I had stitched the border on and checked the seam position. Trimming was the final step of stage 2 - Attaching the Borders.


3.  Mitring the corners

It's been a long time since I've mitred corners, but it's definitely easier the second time around.  There are plenty of tutorials about mitring corners, but I'll just show a few photos of what I did.  If you haven't done it before, I suggest you consult a full tutorial before you try this.

I folded the quilt right sides together so the borders lay on top of each other

I lay the ruler along the folded edge of the quilt (bottom left in photo),
with the 45 degree line on the edge of the border. (where my pen is).
Then I drew a stitching line across the bottom of the ruler.  

The stitching line pinned and ready to sew.
I sewed along the marked line.

After I'd sewn the seam and checked it from the front, I trimmed off the excess borders 1/4" from the seam.

Look at that!!! It's perfect.  I know that the windows don't match up, but that was very unlikely given the design of the borders.  I don't mind because the borders are very dark and it won't be very obvious.  


Then I hand stitched the corners closed where the machine stitching finished before the corners.

Hand stitching the corners closed.

Finally I took the foundation paper pieces out.  I left them in all this time to stabilise the borders and prevent stretching.


So there you have it.

I know it sounds like a lot of effort, but I love the result so it's totally worth it to me.  I do intend to hand quilt my Ballet with Kaffe quilt, but I'm going to take a little break and work on some other things first.

You can find my other posts about my Millefiori Quilts on the tabs at the top of my blog:

la Passacaglia

Ballet with Kaffe 


Friday, 13 December 2019

Ballet with Kaffe revisited (and the Peacock Party)

My poor Ballet with Kaffe quilt has been neglected for months.  So many other tempting things have come along this year, so I put this one away and haven't done anything on it since February.


However, Quiltmania have just started advertising Willyne Hammerstein's fourth book, Millefiori Quilts 4 and that has spurred me into action.


Of course I want the new book, and I probably want to make quilts from it, so I really need to finish my Ballet with Kaffe from book 2. I've worked on it every night this week with no distractions.  That's pretty good for me!


You can read more about this quilt on the Ballet with Kaffe - Millefiori Quilts 2 tab at the top of the page or by clicking here.


Now it's time for the Peacock Party.
What have you been up to this week? Have you had any time for quilting or stitching? Or are you busy preparing for Christmas?


You are invited to the Inlinkz link party!
Click here to enter


Friday, 11 October 2019

Symposium wrap, a survey, and the Peacock Party

What a week that was!

Some blocks I started at Symposium

Yes, I'm back from Symposium and filled with inspiration.  I met so many lovely people and I want to thank all of those people who came up and introduced themselves to me.

There must have been at least 3 people every day who came up to me and quietly said, "You won't know me, but I read your blog / follow you on Instagram".  It's wonderful to know that so many Kiwis read my blog.  I really thought most of my blog readers were American, but it's great to know that there's plenty of Kiwis too. I try to keep things pretty real, and I guess that appeals to Kiwi quilters.

I had a great time at Symposium, and I'm very grateful to all of the organisers.  I run conferences and events for my job, so I know how stressful it can be.

After big events I like to run a survey to check how it went, and what we could do differently next time. I don't think that the symposium people will be running a survey, so I've put together an unofficial survey and invite you to take part if you attended symposium.  All responses are totally anonymous - there's no way for me to find out who said what.  I won't share any direct quotes, only aggregated data such as "60% of people who responded to my survey attended the gala dinner and at least 3 days of classes". I think it's important to capture this information before it's all a distant memory.

Here is a link to the survey.  It will take about 3 minutes to answer the questions, and it will be open for one week, until 18 October NZ time.  Feel free to invite your friends to respond too.  Thank you.


Click here for The Unofficial Quilt Symposium Survey 
by Wendy's Quilts and More.


So, what did I do at symposium?

On Days 1 and 2 I took a Dodecagon class with Margaret Sampson George from Australia.

Mum's on the left, mine on the right.

I convinced my mum to join me in the class, and she loved it too.  Although we can both English Paper Piece, we learnt valuable lessons about colour and pattern from Margaret.  We also made lots of new friends because there's plenty of time to chat to other people in hand sewing classes.  

My mum, Joy Hill, standing on the left, and Irene Anderton seating on the right


trying out hexagon surrounds

Exploring different layouts using everyone's rosettes


a closeup of  Margaret's quilt, showing how she anchors the border by using the animal print sparingly

a wider view

If you're keen to start a Dodecagon quilt you can get templates and paper pieces from www.paperpieces.com or the Ribbon Rose in Auckland had some when I was there on Monday, and they can always order in more. I'll warn you though, getting the points from 12 pieces to meet nicely in the centre is quite tricky.  But practice makes perfect. 


On Days 3 and 4 I took a hand piecing class with Wendy Whellum from Adelaide, Australia.

We started 4 blocks from Wendy's Pieces of the Past quilt.

Wendy Whellum's Pieces of the Past  quilt


I chose to use my Neptune and the Mermaid fabrics by Tokyo Milk.  I actually bought these for something at the previous symposium in 2017, but I was never happy with the one block I made, so I abandoned that idea.  I'm much happier with this idea, and am excited about making these blocks.


I could already hand piece, and have made two entirely hand pieced quilts, but I wanted to refine my skills and learn more.  I was very keen to perfect hand sewing curves, and I do believe I have improved.


There are two main tips I can share for hand sewing curves:
- "always sew with a smile, not a frown" - have the piece shaped like a "U" facing you.  That's the smile side of the curve.
- mark your intervals and pin at those intervals before you start sewing. Fold your pieces to find half way, quarter way etc.

We had a lovely small class so we got lots of hand sewing done.

There's still a lot more to say about Symposium, but I'll cover other things in future blog posts.  Don't forget about the survey please.  I'd love to hear your feedback.


So now it's time for the Peacock Party. What have the rest of you been up to while us Kiwis have been at Symposium?  Feel free to share a recent blog post below.


You are invited to the Inlinkz link party!
Click here to enter


Wednesday, 6 February 2019

Millefiori Quilts 2 - Ballet with Kaffe Fassett

I've been working on my Ballet with Kaffe quilt recently.  This quilt didn't see a lot of action in 2018, but I'm certainly giving it all my attention now.  I'd really like to finish it this year. 


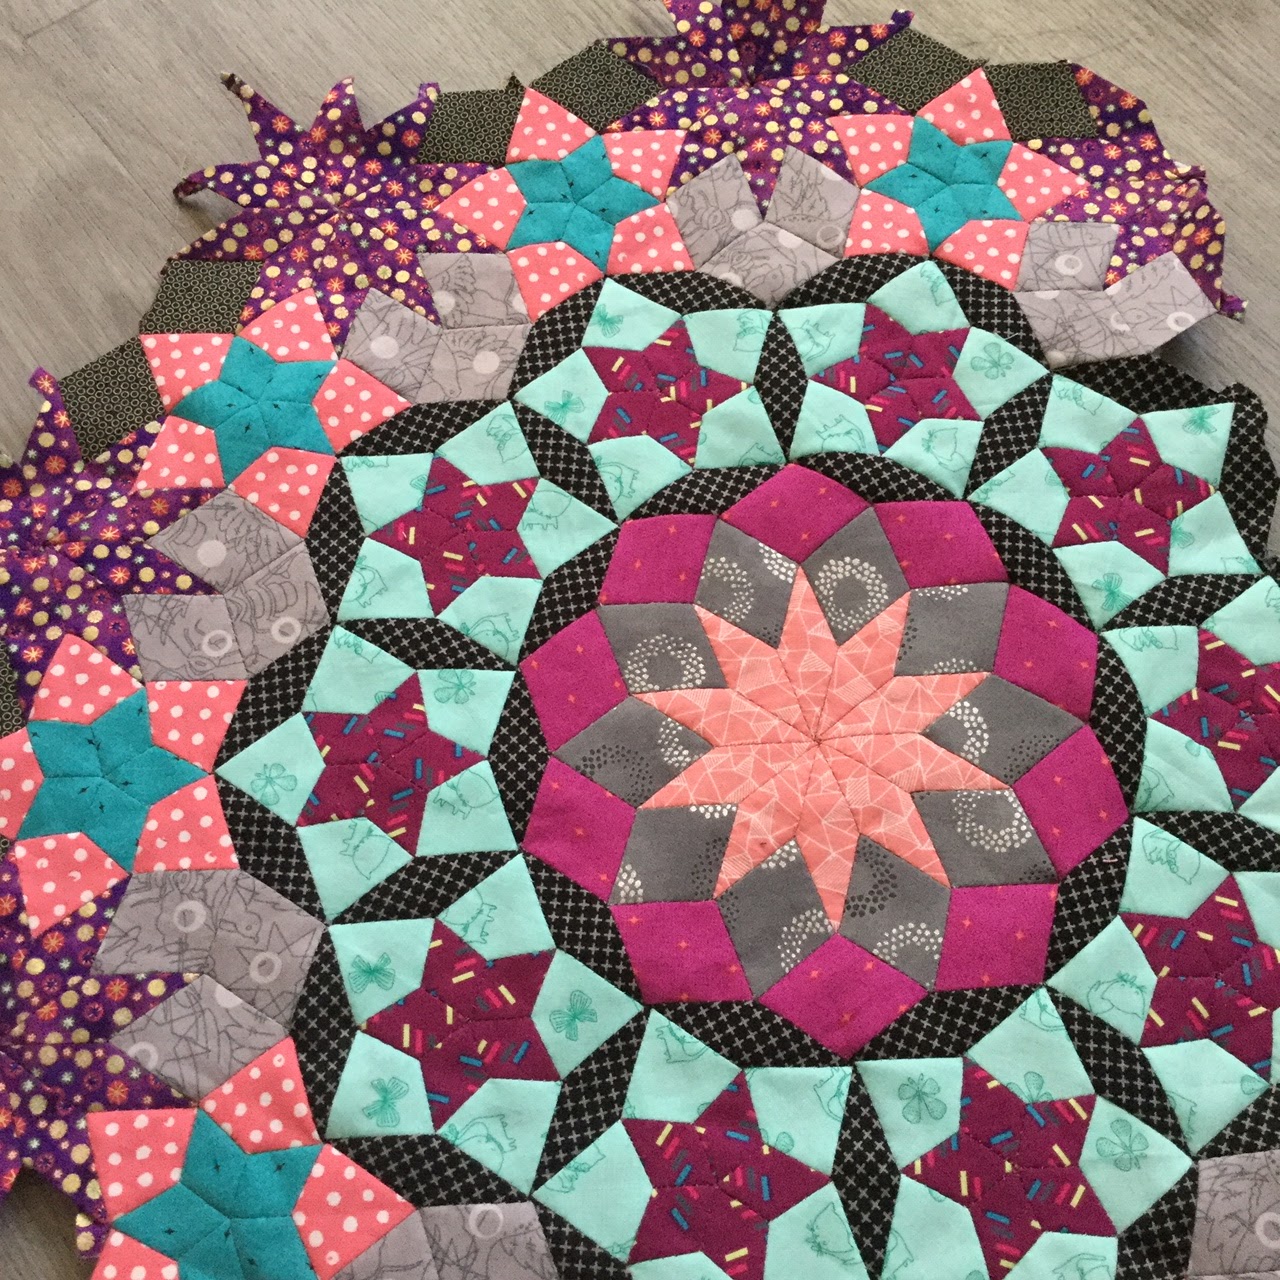
The pattern is called "Ballet with Kaffe Fassett" from Millefiori Quilts 2 by Willyne Hammerstein.  It's the quilt shown on the cover of the book above.  My inspiration fabric is the one on the left by Cotton + Steel.  I'm trying to keep the the colours used in that fabric because I love how they look together. 


I'm English Paper Piecing my quilt, but it can also be hand stitched with a running stitch. I glue baste my pieces with a glue stick from SewLine or Sue Daley.


Last year I made four of the largest rosettes, so this year I've been working on the filler pieces and trying to join the rosettes up. This represents two thirds of the quilt.


I spend a lot of time planning my rosettes and trying to get the colour balance correct.  As I've said before, I hate unpicking English Paper Piecing, so I only sew a rosette in once I'm really sure of it's placement.  I leave the fabrics on the floor for a few days before I even cut the pieces out.


I think about the colour placement while I watch TV at night. 


This pattern really is very complex.  It's even harder than la passacaglia! and I'm not the only one to say that.  It's hard to get the points of the 10 pointed stars meeting nicely in the centre.  And the rosettes merge into each other more than they did in la passacaglia.  Anyway, I've come this far, so I am going to finish this quilt, and hopefully that will happen in 2019 because Willyne has a new book coming out in 2020 and I want to be ready for that!

You can find all of my other posts about this quilt on the tab just under the header photo, or by clicking here.