Showing posts with label nancys stitch studio. Show all posts

Friday, 24 August 2018

Cobweb Quilt update

Since our exhibition I've been busy working on some WIPs (plus making a very small new start that I'll talk about next time).


I started this quilt in a class at Nancy's Stitch Studio in April 2017, and I last posted about it back in March 2018.  You can read that previous post here because I'm not going to repeat where to get the pattern from etc.


Last week I finally sewed all the foundation paper pieced sections together.  Months ago I laid them all out in my hall way, then went upstairs and took a photo of the layout.  I bagged them up in rows so I wouldn't join the wrong sections together.


My new kitchen bench works so well as a quilting table!


Unfortunately now I've got the massive job of removing all the papers.  Many people on Instagram have told me that I should have removed the papers before I sewed it together, but the pattern designer (Chris Kenna) is a very experienced quilter and quilt judge, and she said we should leave them in.

Having the papers in certainly helped with aligning the sections when I joined the rows together.  There would have been a lot of stretch otherwise.


Anyway, I've been removing papers every day this week, and I'm half way done now.  I guess I might be finished by next weekend.


As for quilting - yes, I'm going to hand quilt it.  I'll work out how when it's basted.

Anyway, I'm in love with my Cobweb quilt and can't wait for the weekend.


Saturday, 24 March 2018

Cobweb Quilt / Millefiori

About a month ago I dug out my Cobweb Quilt that I'd started in a class with Chris Kenna on 1 April 2017 - almost exactly a year ago. This pattern is by Chris Kenna and I've included details of how to get a copy further down this post.

Chris Kenna's Copbweb quilt hanging up

I'd made quite a few cobwebs at our guild's retreat in July 2017, but I really hadn't touched it since.


So I decided to sew a few more cobwebs while I took a break between other WIPs.


You're possibly thinking that these fabrics are quite different to my usual colour palette - well, you're correct.  I'm deliberately trying to use different colours and values, so my quilts don't all end up looking too much alike.  I like variety and I want to try out lots of different types fabrics (possibly with the exception of French General - but never say never!).


I like to sort my pieces and cut them to the required lengths before I start sewing.
I got on a roll and I've spent the last four weeks working on this quilt every day.  I've now finished all of the segments for the quilt. The cobwebs AND the stars.  Yay!!


Now I'll be able to assemble it at our next guild retreat in July 2018.  This quilt isn't easy or quick - it's very labour intensive because every single piece is foundation paper pieced.  There's a huge amount of cutting, pressing and sewing involved, but it's the variety of fabrics that makes it look so good. I developed a system of piecing a number of blocks at the same time, to avoid jumping up and down to the cutting board and iron too frequently.


Many people have asked me about this pattern.  The best way to get this exact pattern is to email Minerva Book Shop in Wellington, New Zealand. orders@minerva.co.nz They can post you a copy (anywhere in the world), and will be sure to include the correction to the template published in the magazine. If you've got an old copy of the magazine at home, be sure to email or phone the shop and ask for the corrected template before you start sewing.  Otherwise your star points won't meet nicely.

However, there are a number of similar patterns available - just google "cobweb quilt pattern". Kathy Doughty and Sarah Fielke have good ones in their book Material Obsession Two.  (Pop Stars and Maple Leaf Rag - page 116.)

Tips for joining Foundation Paper Pieced sections.
1.  It's important to get the seams meeting up nicely when you join the pieces.  I very carefully put pins straight through the two pieces to be joined, making sure that the seams match up.


2.  As I'm ready to sew each piece I replace the pins with Clover Clips - flat side down.  Clover Clips hold the pieces more firmly than regular pins which tend to distort the pieces as you remove them
.

3.  I use my walking foot to sew the pieces together - it's so much easier!!


4.  I lower the stitch length to 1.70 for all foundation paper piecing.  This makes it much easier to remove the paper later because the holes are punched closer together.


5.  Although the pattern in the magazine says to trim the seam allowance off the papers before you start, Chris told us in the class to leave it on.  I prefer to leave it on myself.

6.  When you do come to join up your blocks, Chris told us that the points will sit as shown in this photo of her quilt.  The slight indentation is unnoticeable in the finished quilt.


"How will I quilt it?" I hear you asking? Well, one thing is for certain, I won't be quilting it on my domestic machine.  Therefore I'll either get it quilted by a long armer, or hand quilt it.  I'm still thinking about that.   

Friday, 29 September 2017

Holey Moley progress

Before I became a quilter, I used to love doing embroidery.  These days I have to make time for embroidery because quilting seems to have taken over my leisure time.
 

Back in March I showed you these gorgeous threads I had chosen for my pulled thread work called "Holey Moley".
 

We've had four lessons so far, and have learnt some new techniques.


I'm currently spending a lot of time stitching the outlines and then filling the areas with Rhodes stitch in pink.


This is a unique design developed for us by our tutor.  Please respect that, and if you'd like to make something similar, please be sure to modify it to make it uniquely yours.  (Sorry to have to say that, but I have to say it because it's not my design.)


See how big the piece of linen is!!! See how much more I've still got to do!!

Yes, it's going to be lovely when it's finished, but that is still many months (dare I say "years") away.


I'm going to keep plugging away at it, especially because we've got two more lessons to go yet. It's always easier to keep motivated when you know you've got to report in again.

Friday, 21 July 2017

EPP classes in Wellington - Octagons and Squares

Many of you know I'm addicted to English Paper Piecing. I just love all the great patterns that can be created with shapes and colours.  Would you think these two pieces below are made from the same two shapes?


Well, they are.  They are both made from just ocatgons and squares. If you live in Wellington you can come to my class at Nancy's Stitch Studio and have fun experimenting with shapes and colours.


Yes, I'm teaching English Paper Piecing classes at Nancy's on Wednesday 9 and 30 August in the mornings and evenings. Click here for more information. Come along and learn all my tricks and tips for making great English Paper Pieced quilts and table runners. We'll be using glue basting and precut paper pieces, so there won't be any fiddling about with paper and scissors and wonky lines.


I hope to see some of you there.

Saturday, 25 March 2017

Even more embroidery

Yesterday I chose my fabric and threads for my other major embroidery class - Holey Moley.  Again, I'm a student, not the teacher.


I took my inspiration from the beautiful verigated Stef Francis threads and just picked complimentary colours.  This class starts on 5 April so I'm almost ready to go.  I just need to trace the design onto the fabric now, but I'll do that at Nancy's Stitch Studio because they have a light box.

One of my "no reply blogger" readers asked me to recommend an embroidery book, so I'm showing this Embroidery Stitch Bible that I've had for about 10 years now.  


It shows a lot of stitches, but it gives step by step instructions too, so I find it very helpful.  Here's an example:


Another "no reply blogger" asked if I put backing behind my green fabric for the Textured Floral Extravaganza, and the answer is "Yes". 

If you suspect you might be a no reply blogger, and want to check or fix it, please see this post here. 


I don't have a lot of pretty plants in my garden, but I was very pleased to see this rhodendron flowering. 


And finally, I achieved my goal of completing 25% of A Treasured Time in the first quarter of the year.  This means it might just be finished and framed before Christmas (if I can keep up the pace through out the rest of the year). I'm leaving the backstitching until the very end.


Friday, 10 March 2017

Embroidery progress

My first embroidery class of 2017 started at Nancy's Stitch Studio two weeks ago.  (I'm a student, not the teacher.)

It's called Textured Floral Extravaganza and we are going to cover a lot of different techniques.

Just part of the class sample designed and stitched by our tutor, Ann Marie Moorehead

I chose my feature thread first (the hand dyed Stef Francis verigated thread) and then dyed my fabric green to match it.  Although the class sample is beautiful and subtle, I couldn't imagine stitching beige on beige myself.


In the first lesson we started to stitch the stem of the flowers with raised stem stitch.


We also learned how to basket weave some leaves with coton a broder. This leaf will be finished off with whipped chain stitch around the outside.

same fabric - different lighing

When I left my class I saw some wild lilies growing on a bank, and was pleased to find my colour scheme replicated in nature - always a good sign that colours work together.


I've also been plugging away on my peacock tapestry cushion. It's very nearly finished.  I'm going to take it away next weekend when we go to Tauranga for a work social weekend.  I remember working on it in Rotorua at last year's social weekend, so it would be fitting to finish it at the 2017 social weekend.


And I'm also trying to do a bit each month on A Treasured Time by Dimensions Gold.  I would really like to have it framed for Christmas 2017.


Saturday, 11 February 2017

My embroidery priorities for 2017

I've just chosen my embroidery classes for 2017, so I can now write my list of things I'd like to make this year. Once again, I'm going to keep it simple and list my top priorities only.  I'm tired of listing the same things year after year and never doing them! Maybe one year I'll suprise everyone and just quietly make one of them when no one is looking.

1. Holey Moley


photo from Nancy's Stitch Studio
This will be six classes at Nancy's Stitch Studio spread out over the year. I haven't done this type of Jacobean embroidery so it will be very interesting.

2. Textured Floral Extravaganza

Photo from Nancy's Stitch Studio
This will be another set of six classes spread out over the year, with homework in between the lessons! Once again, I see new techniques that I haven't tried previously.

3. A Treasured Time

I started this Dimensions Gold kit in October 2016 and would really like to have it finished and framed before Christmas. I love this scene, especially as we have Christmas in summer in New Zealand.


Here's where I'm up to:


4. Peacock at Sunset

I'm more than 50 % done on the Ehrman tapestry, so I plan to finish it in 2017.


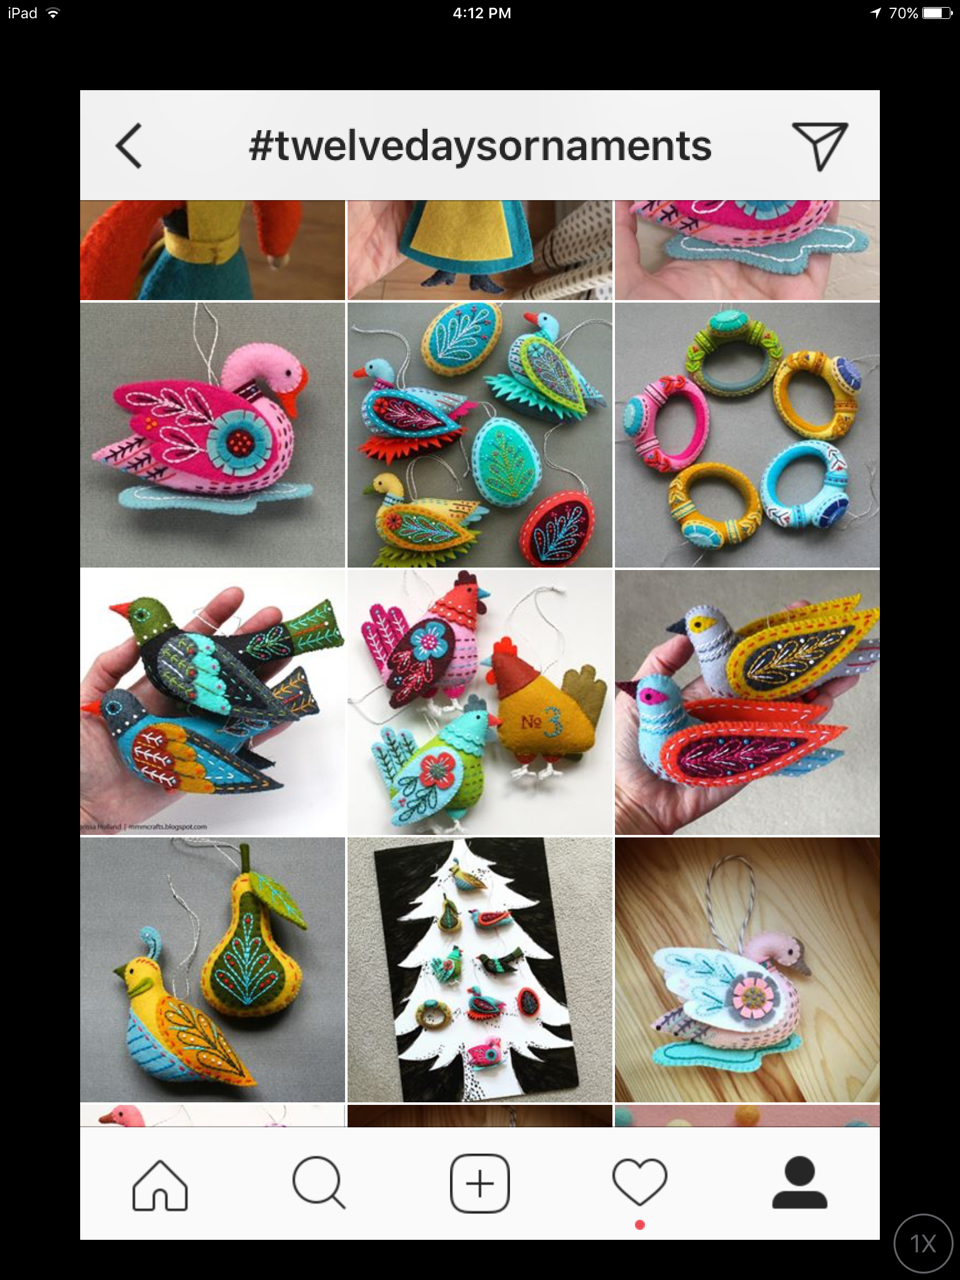
5. Twelve Days Ornaments

This is a gorgeous range of wool felt Christmas ornaments designed by Larissa Holland.


I stumbled across them on Instagram (@mmmcrafts) but you can also see them on Larissa's blog here. I've already made a tiny start, just to try out the method and test my Sulky Solvi.  Now I need to decide what colour felt I'm going to use. I can see this taking up a lot of time as I keep adding extra touches.


So that's it! Five main things to work on this year.  Plus my quilts of course (which you can see here).