Monday, 8 June 2015

Capital Quilters

We had our 30th birthday party at Capital Quilters on Saturday.  We were each given one of these very useful cloth bags to celebrate our 30 years as a guild.  I thought it was a really good idea.


I've already written my name in mine so no one else can run off with it.

On behalf of my Canadian readers, I put up my hand and asked about the origins of the bear paw logo, and why we, a guild in New Zealand (which I don't think has any life threatening animals) chose a bear paw as our logo.  There were at least 4 people in the room who were present when the guild started. They said that a vote was held, and people chose the bear paw because of it's meaning - Hand of Friendship, not anything to do with bears sorry.


I've started hand quilting my scrappy bear paw quilt. I'll use Perle 8 and big stitch hand quilting. Of course I'll colour co-ordinate, and use a matching Perle 8 for each block.  I don't even think that I'll have to buy any more colours of thread. I've got so many in my box.


The President of the guild stood down at the AGM on Saturday, and we had been secretly asked to make her a Retail Therapy block in her favourite colours of pink, purple and aqua blue.  I couldn't fit them all in one photo, but they looked great on the wall and she was delighted.


Aren't they great. Here's a closeup of my contribution:


I had to use zig zag because I couldn't get the blanket stitch to work on my old machine!  The beautiful Bernina in the photo at the top of this page is my brand new machine, which I'm just learning how to use.  I have a lesson on Thursday and things will be better after that.  I told my family that it's like moving from my 1979 Ford Escort (my first car) to my current Subaru Outback - everything is different! Electric windows, keyless entry and ignition, automatic transmission, dashboard handbrake, etc etc. My previous machine was a Bernina 910 that I purchased in 1987, my first year of working after university. It's done really well, but I want to do more machine quilting in future, amongst other things.  The new machine is so smooth and quiet. I love it already.


The new Bernina 550QE is both my 25th Wedding Anniversary present (June 2) and my upcoming 50th birthday present (October).  Here we were 25 years ago. Look at all that blow waved hair!  Yes, Serena and Carla, my bridesmaids wore purple!!!  Somethings never change.

I'm linking up to Blossom Hearts Quilts. It's her blog's 3rd anniversary and there are lots of prizes up for grabs.


Monday, 1 June 2015

Thank you

Thank you to everyone who voted for my Flower Garden table runner in the Online Bloggers' Quilt Festival.  There were many amazing quilts entered, and I'm humbled that mine would be voted the winner in the Applique category.


Thank you to Amy's Creative Side for running this festival twice a year.  It must be a big job to organise everything, including sponsors.

I was quite surprised at how many winners come from outside of USA.  There are quite a few from Poland this year, including the winner of the Viewers' Choice award, Gosia. You can see her quilt here. And you can visit all the winning entries from this page.

You don't have to be an amazing quilter to enter this competition.  You just need to take some photos of your quilts, write a blog post, and link up. The next festival will be in November/December, so I encourage you to start thinking now about which of your two quilts you will enter. They don't need to be new, they could be something you finished 2 years ago. They just need to be new to the competition.

Thanks again, Wendy

Sunday, 31 May 2015

Possum Magic - Riddle and Whimsy's quilt

Last month I had the pleasure of working on Jo's quilt. She blogs at Riddle and Whimsy.

I think Jo made the most adventurous centre block out of all of us.  She just made an arrow, and the really brave thing was, that it wasn't set in a square, it was a rectangle!


I've just realised that no one has added a traditional 4 sided border to Jo's quilt. Everyone has just added to either one or two sides of her quilt.  When I received it from Alice it looked like this:


Alice had just added the teepees and triangles down the left hand side of the quilt.  When we met for the quilt handover, Alice suggested that I might want to add something down the right hand side. That would turn it more into a square, and centre the arrows and the target more.

I thought that was a good idea, but as you can see from the above photo, Jo's quilt had got a bit wonky as it traveled around the group.  Carla, another member of Possum Magic, wrote a blog post about wonky round robin quilts just a few weeks ago.  You can read it here.  In Carla's case she had Rebecca's quilt and it had a bubble in the middle, that Carla described as a bra B cup.  When I looked at Jo's quilt above I thought it looked like a corset - wider at the top and bottom and nipped in at the waist (maybe I've been watching too much Poldark).  Anyway, we both likened the quilts to ladies underwear.

The fact that the quilt has got out of kilter is no one person's fault.  All these diagonal cuts mean that the fabrics can stretch quite a bit.  Often the deadlines are looming when people have been attaching their borders, so they've just quickly sewn on the borders and posted it off.  Fortunately I had the quilt early and had some time available to work on it.  I knew my own border was going to be quite simple, so I thought I should try to straighten it up.

I thought of all the work that Carla and Serena had put into fixing Rebecca's quilt, and thought I couldn't just sew my border on and expect Carla and Serena to fix Jo's quilt too.  So I was very brave and unpicked three of the borders, removed some of the excess fabric, and sewed it all back together.  Once it was sitting flat and was all squared up, I sewed my own border on.


I deliberately left quite wide margins around the diamonds - nothing worse then cutting the points off. It will be easy for Jo to take my long border off and move the diamonds closer to the centre if she wishes.

I used some of Jo's favourite Anna Maria Horner and Tula Pink fabrics in my borders.  Once again I purchased the low volume background because you know I don't have any in my house.


Here's how it looks now.  This quilt is going straight back to Perth. Carla, Serena and Jo will collectively finish it off for Jo.  It's almost square which means that they could continue the small half square triangles right around if they wish. I think that would look good.


I've got one final Possum Magic quilt left to work on and it's Sharon's.  It's amazing - so colourful and so much detail. I'll show it to you soon.

Last thing - To Bella Quilts - I'd love to email you back but you show up as a 'no reply blogger'.  I've tried to track you down but really can't find how to contact you.  Can you email me directly at wendysquiltsandmore at gmail dot com please? I'd love to be able to reply to your kind comments. Thank you.

Sunday, 24 May 2015

Scrappy Bear Paw Quilt

I've really got to think of a better name for this quilt.  At the moment I'm just calling it what it is, a scrappy bear paw quilt.  I really didn't want to be tempted by new patterns this year, but this quilt has special significance.


I belong to Capital Quilters in Wellington, New Zealand, and the bear paw block is part of our logo.  Our guild will be 30 years old this year, and the committee came up with the idea of making bear paw quilts as a way of celebrating the anniversary.  Of course, members are free to make the quilts in whatever fabrics they like. Some people are using French General, others are using Tula Pink etc etc.

As I'm not quite 50 yet, I'm thinking that I might still be around when the guild turns 50 in 20 years time, and I can pull out my historic scrappy bear paw quilt and show all the "young ones" what we made back in 2015 when the guild turned 30.

When my friend Anne (@ihaveafabricproblem on Instagram) showed her single coloured scrappy blocks on low volume backgrounds, I was hooked.  I immediately thought of all my beautiful Kaffe Fassett fabrics and how I could use those in a quilt like this.  Most of you know that I've resisted low volume prints for a long time, so I had to buy fabrics for the background, but I made all the coloured sections entirely from my stash.

Here are each of the 9 blocks up close so you can see all the great prints.

this one is made entirely from Kaffe Fassett prints


I remade this block because I wasn't happy with the original version. The yellows weren't strong enough compared to the other blocks.


I found some great sashing fabric and joined the blocks up yesterday.


The quilt isn't finished yet, but I'm happy to have a finished top.  I need a bit of help with the next two steps if you'd like to help out please:

1. What sort of backing should I use?  I keep thinking that the Ikea text print would work here, but we don't have Ikea in New Zealand, and I hear it's being discontinued anyway.

2.  Should I add a narrow border in the same fabric as the sashing, or just skip the border and go straight to the binding?

Instructions
Many people have asked for instructions on how to make a quilt like this.  I can't really post the pattern exactly as it was given to me, but there are a lot of patterns and instructions for bear paws blocks on the internet.  Just so you know, here's what I did. If you're an experienced quilter you'll understand these notes:

cut 17 x 3.5" squares from bright fabrics
cut 8 x 4" squares from bright fabrics

cut 8 x 4" squares from background fabrics
cut 4 x 3.5" squares from background fabrics
cut 4 X 3.5" x 9.5" rectangles from background fabrics

I turned the 4" squares into HSTs by ruling a diagonal line and sewing along both sides of the line. I cut down the line and trimmed the HSTs to 3.5" squares.

Keep a picture of the block in front of you at all times, and double, triple check that your HSTs are pointing the correct way. Everyone I know has made a mistake at some stage.

I made each of the 4 sections of the block by forming rows of 3 and then joining them to make each section of the block (9 pieces). I then joined the top half together, sewed on the middle section, and then joined the bottom half to the top.  The block measures 21.5" square unfinished.

I cut my sashing at 2.5" wide and added cornerstones at the intersections.

I hope you can understand that.  Writing instructions is harder than I thought.  I think I'll stick to sewing.


Friday, 22 May 2015

La passacaglia update

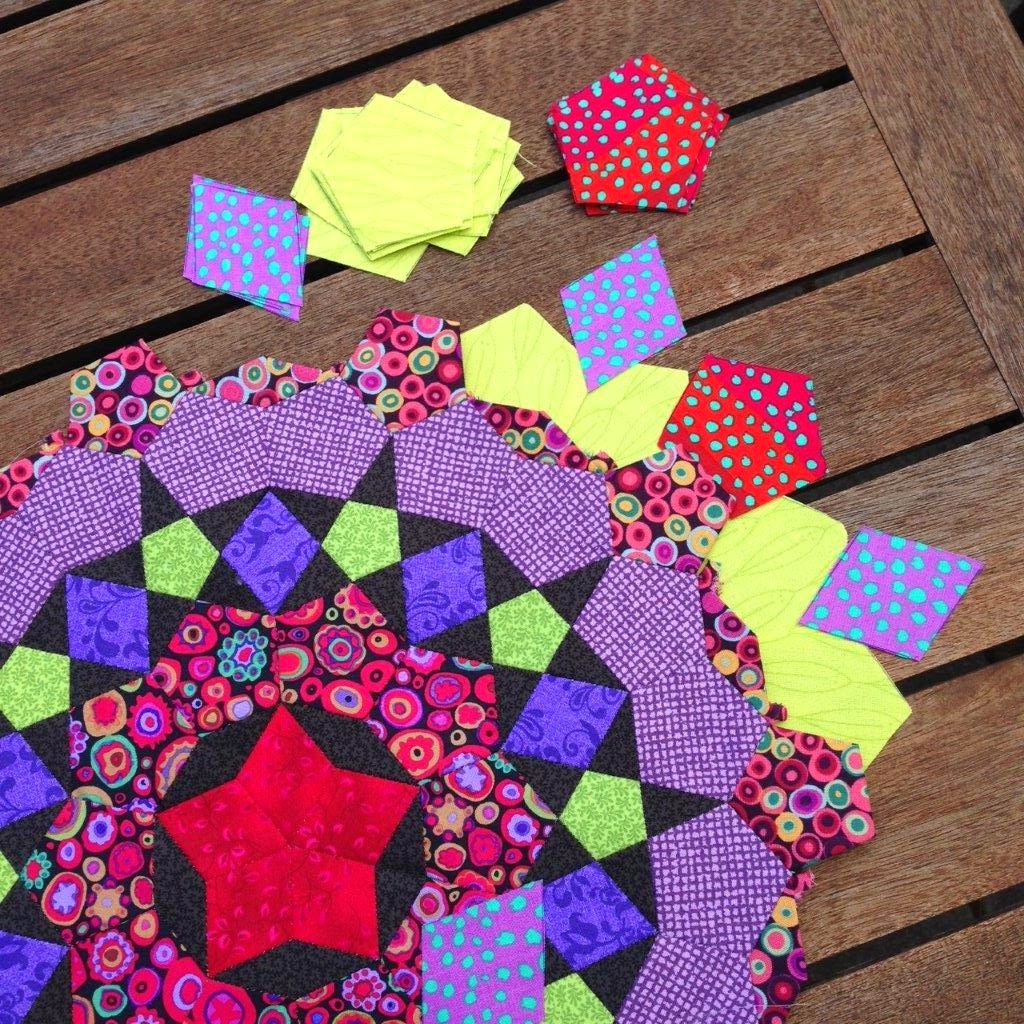
I've just realised that it's about 20 weeks since I started my la passacaglia, and I've made 20 centres. I think that's quite good going.  Here's how it's looking now:


The photo below gives and idea of how one corner of the quilt will look once I add the stars and join the pieces - a big centre surrounded by 10 smaller rosettes - not necessarily these rosettes.


Here's is a close up of my other large rosette with a bit of forward planning.


I've still got two more large rosettes to make, and I've just decided that it will be the two rosettes below that I enlarge to become focal points. I love all the pattern going on in these rosettes.  I haven't done a huge amount of fussy cutting, but rather I'm working on making the colours give the desired effects.


The pattern for la passacaglia is in this Millefiori Quilts, published by QuiltMania, but also available through Paper Pieces in USA.


The first book has become so popular that Willyne Hammerstein has written a second book with even more beautiful patterns. I'd really like to make the quilt on the cover - Ballet Avec Kaffe Fasset, one day.  You can have a sneaky look inside the book here. My own personal copy arrived at the weekend.


Sometimes it's interesting to look back to the start of a project.  These were my original fabrics that I set aside for this quilt.


I've used most of the blues and the pinky reds, but I haven't really used the dusky pinks. I think I'll leave them out now because the quilt has enough colour without them.  I'll use them in another project - maybe Smitten, another paper piecing pattern I just bought recently. I don't like all my quilts to be in the same colour ranges, so I might just save them for that.

It's easy to lose momentum on a big project like this, but my friends in the Millefiori/ la passacaglia English Paper Piecing facebook group are keeping me motivated. They're a great group and welcome anyone with an interest in quilting and paper piecing.

Sunday, 17 May 2015

Kapiti Quilters' Exhibition

Today I went to an exhibition put on by Kapiti Quilters.  The Kapiti Coast is a beautiful seaside area, about 30 minutes drive north of where I live in Wellington.  The exhibition was at Southwards Car Museum, so my husband and son inspected the cars, while I inspected the quilts.

This beautiful mini quilt by Sandra Killin really does reflect what the country side is like at Kapiti.  Those plants at the front are toitoi, a New Zealand native pronounced toitoi.


Oh, it's the same area as I went to at Easter when my parents were staying with us, and we went to the beach that day too.  You can see those beach photos here. This was my view at lunch today - that's Kapiti Island, a nature reserve.  Ignore the skatepark in the foreground.


I was really taken by the mini art quilts on display today.  I think that's what I want to focus on once I get my current WIP pile under control.  I haven't previously been drawn to art quilts, but maybe my tastes are changing, because I really liked a lot of what I saw today.  Here's some of my favourites. None of these were more than 40" high, and the square ones were about 20" x 20".

Bamboo by Robyn Burch - I love the lime green

by Judith MacDonald - 150 tiny blocks all foundation paper pieced

by Sheryl Meech

by Beryl Stevenson

Green Fire by Judy Boyle

by Bobby Duncan

by Robyn Burch

Colour Play by Paulette Meldrum

These quilts have so much detail packed into very small spaces.  They were just beautiful.

Saturday, 16 May 2015

Bloggers' Quilt Festival - Flower Garden wool felt applique

Hello and welcome.  This is my second entry in the Bloggers' Quilt Festival.  It's my wool felt applique Flower Garden table runner.


This quilt is made from a pattern by my favourite quilt designer, Wendy Williams of Flying Fish Kits.  The pattern is in her book called "Wild Blooms and Colorful Creatures". In the book it's called "Clamshell Garden Runner".


I went to a class to learn how to make this quilt. Each year in Wellington we have a big event at Queen's Birthday weekend (first weekend in June), called Hand Made. There are many classes on offer and subjects include sewing, knitting, jewelry making, cheese making, etc.  Back in 2013 Wendy Williams was one for the guest tutors and she taught a class on how to make this table runner. I was already aware of her work and loved her style, so I attended the course.


I had a great time at the class, studying all of the other beautiful quilts and objects Wendy had bought with her, and buying up lots more patterns and brightly coloured felt.


These flowers are fussy cut from fabrics, and then hand appliqued onto the wool felt. The felt shapes are them attached to the background panel with coloured Perle 8.


This quilt was one of those very rare things that when I came home from the course I just continued sewing until it was finished. I loved every step of it, The clam shells weren't easy to get straight, but I do love the lime greens.

I especially love the Kaffe border too.  I hand quilted it with blue Perle 8. There's minimal hand quilting within the panel itself. The flowers already stand out and I wanted them to be the feature.


I wanted to put Kaffe on the back too, so I chose a bright and cheery print, with plenty of purple and lime green to match the front.


This quilt hangs above the bed in the spare room and really brightens up that room.

Finished size: 21" x 50"
Design: Flying Fish Kits

I do love this quilt, and I've enjoyed sharing it with you.  My other quilt in the Bloggers' Quilt Festival is my Mini Medallion and you can read about it here.


Voting isn't open yet, but I really encourage you to go and check out all the other quilts in the Bloggers' Quilt Festival. More and more will be added to the linkup until entries close on 21 May. Then voting will be open from 22 May until 29 May. Winners will be announced on 30 May.  It really is a great way to see a huge range of quilts from the comfort of your own home.