Friday, 28 June 2019

Sashiko and the Peacock Party

I've been doing a bit of sashiko lately.  It was easy to do on the plane because I precut the threads and left the ends to be trimmed when I got home - so no scissors required on the plane.


This is a pre-printed panel that I bought from Indigo Niche in Australia, but I seen it for sale in other retailers too.


I'm mixing it up by using 3 colours to match our dining room chairs.


Some of you will remember that I made a full sized sashiko quilt back in 2012.


These blocks weren't pre-printed - I chose the patterns from books and the internet and scaled them to fit within my blocks.  You can read how I transferred the designs on my blog post here.
 (This is the advantage of having a blog - you can just refer to earlier blog posts for all the facts and figures!) 


Now it's time for the Peacock Party.  Did you notice that the link ups spilled on to a second page last week?  That's the first time we've had 25 people linking up to the Peacock Party.  Thank you, thank you everyone.  I know it takes time for these things to grow, so I'm committed to sticking with this link up.

Feel free to link up a recent blog post below:


You are invited to the Inlinkz link party!
Click here to enter

Tuesday, 25 June 2019

It's Carnival time at QuiltNSW Sydney Quilt Show

I'm very pleased to finally share some photos of my prize winning Carnival quilt on my blog. I just love how it's turned out.


This was my primary entry in the 2019 QuiltNSW Sydney Quilt Show - and it won two prizes!!!  Firstly I won a Judge's Commendation in the Pieced Quilt (Amateur) section, and then the Best Traditional Quilt Award (Amateur), which was judged across all of the amateur quilts in the show!


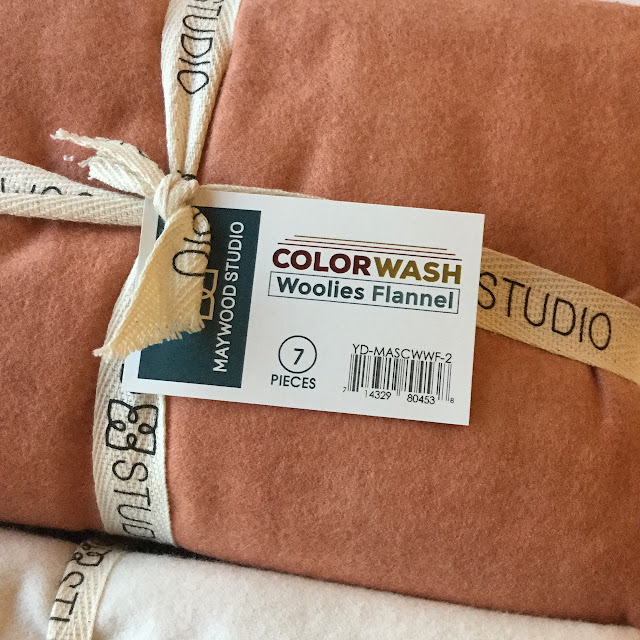
I was thrilled to win these awards, and very grateful to the sponsors and organisers.  My prize was sponsored by Lloyd Curzon Textiles who are wholesalers in the Australian market.  I won this wonderful bundle of Woolies Flannel from Maywood Studio.  These fabrics look like wool, but they are actually cotton flannel. I'm going to have fun making something special with these fabrics.  They remind me of the lovely quilts Sue Spargo creates, so I might just do something along those lines. 


I also won $100 from QuiltNSW and I confess to spending it five times over at all the retailers at the show! 

You can view all the winning quilt on the QuiltNSW website here.  I still can't believe my quilt is fourth on the list!


It was lovely to meet so many blog / Instagram / Facebook followers at the show.  Even though there wasn't time for indepth chats with everyone, it was still nice to say "Hello", and admire each others' quilts. 

My second entry in the show was my Tropical Hexagons which you can read all about here.


It didn't win any prizes, but it was lovely to see it hanging in the show.  Big, bold quilts like this do look great in big venues. 


Carnival quilt details:
I started this quilt in a Cobweb Quilt class in New Zealand with Chris Kenna - a New Zealand quilter.  This is her Cobweb pattern and I've noted further down how you can get a copy if you want to make one too.

Since the class in March 2017 I've spent an enjoyable two years working on this quilt.   The foundation paper piecing took many months, and then I spent a few more months hand quilting it myself. But I've enjoyed every minute of it.

the long orange threads are the basting threads applied by a long armer

The two colours of Aurifil I used to hand quilt Carnival.

I hand quilted Carnival with Aurifil 28wt and it was perfect for this quilt.  The 28wt is a very strong thread, and it worked well on a quilt like this with lots of seams.  I chose to quilt in the centre of each strip rather than in the ditch, however I did quilt in the ditch around the edge of each octagon.


If you'd like to read my earlier posts about this quilt you can click here:
How to joing the sections - March 2018
The top is together - August 2018

If you would like to make a quilt like this, the best way to get this exact pattern is to email Minerva Book Shop in Wellington, New Zealand. orders@minerva.co.nz  They can post you a copy (anywhere in the world), and will be sure to include the correction to the template published in the magazine. If you've got an old copy of the magazine at home, be sure to email or phone the shop and ask for the corrected template before you start sewing.  Otherwise your star points won't meet nicely. 

However, there are a number of similar patterns available - just google "cobweb quilt pattern". Kathy Doughty and Sarah Fielke have good ones in their book Material Obsession Two.  (Pop Stars and Maple Leaf Rag - page 116.)

Stats - Finished size 70" x 70" (177cm x 177cm)
Pattern - Cobweb Quilt by Chris Kenna in NZ Quilter magazine
Techniques - foundation paper pieced and hand quilted
Batting - wool
Thread used - Aurifil 28wt

Awards - QuiltNSW 2019 Sydney Quilt Show - Judge's Commendation in the Pieced Quilt - Large (Amateur) section and Best Traditional Quilt (Amateur).


Friday, 21 June 2019

The Peacock Party

I'm still in Sydney, but that doesn't mean no Peacock Party.  I set this one up before I went away, so do feel free to share a recent blog post in the link up below. 


You are invited to the Inlinkz link party!
Click here to enter

Tuesday, 18 June 2019

QuiltNSW Quilt Show

Today I'm flying to Sydney for the QuiltNSW Quilt Show.  Exciting!!!! I love seeing all the quilts in the exhibition, meeting my online friends in real life, and shopping at the stalls at the show (and in the bricks and mortar shops in Sydney).


I've got 2 quilts in the show, and I'm looking forward to seeing them hanging in the huge exhibition space. I'm not going to say which quilts I've entered until after the exhibition opens - I like to keep these things a secret.

You can follow along with all the fun and excitement by following QuiltNSW on Instagram or Facebook, or on their website. Photographs of all the winning quilts will be posted on their website.

Or you can follow me on Instagram @wendysquiltsandmore or Facebook (Wendy Welsh) if you don't already.  I'll be posting lots of photos while I'm in Sydney, but unfortunately I can't blog again until I get back home on Sunday.  Blogger doesn't work well on my iPad.

I have very happy memories of this show.  Here I am in 2017 with my la passacaglia quilt which won the top prize for an amateur quilter.  I was completely stunned - both to win the awards and to win a Bernina sewing machine!


And here I am last year in 2018 when I won second prize for a Pieced Quilt Large (Amateur) with Vibrant Curiosities.


And a Judges' Commendation for my Matariki entry in the Southern Stars challenge.


The standard of work at this show is very high, so I don't expect to win another award this year, but of course it would be nice if I did.  All will be revealed on Wednesday afternoon in Sydney, Australia.  Photos of the winning quilts will be posted on the QuiltNSW website.


If you see me at the show be sure to say "Hi".  I'm going to be using my Bowl Me Over bag so if you see it - that will be me. I'll be at the QuiltNSW Activity Centre on Thursday afternoon from 1.00pm - 3.00pm, and then doing white glove duty from 3.00pm - 4.30pm on Thursday.  I hope to see lots of you there.
I'll be sure to report back on all the excitement when I get home.


Friday, 14 June 2019

A tapestry cushion, a knitted scarf - and the Peacock Party

Well, I finally feel like I'm making some progress here.  I've finished the stitching on my tapestry, and am just choosing the fabric for the back of the cushion.


Fortunately I had a few Kaffe Fassett half yards in my stash! And I think this "Enchanted" is just perfect because it brings out the blues and the oranges.

This tapestry design is by Kim McLean Designs and is available exclusively through The Crewel Gobelin shop in Sydney, Australia.

I stitch my tapestry without a frame because it makes it more portable, and it would need stretching even I did use a frame.  The nature of tent stitch means that the canvas is all pulled in one direction.


I don't know if this cushion will end up sitting next to my Peacock at Sunset cushion of not, but it might work.

In more good news I've finished my Kaffe Fassett scarf. 


This scarf is very long (2.3 metres), but it's all worth it now that it's finished.  We're experiencing the cold, damp days of winter now, so I will get lots of wear from it.

Last weekend I gave a little talk to a local quilting guild - Coastal Quilters.  They wanted to hear about how I got in to quilting, so I took along some of my earlier quilts.  Here the are hanging on the racks after my talk had finished.  Everyone came up onto the stage for a good look during the tea break.


Each one of these quilts has a story behind it and it was interesting to revisit each one and give it some individual attention.


Now it's time for the Peacock Party.  What's everyone else been up to this week? Feel free to link up a recent blog post and let us know what you've been doing.


You are invited to the Inlinkz link party!
Click here to enter


Friday, 7 June 2019

Mum's Lucy Boston and the Peacock Party

We're back! Our son's graduation went well, and we all enjoyed some family time together in Auckland. 


I got to study mum's Lucy Boston quilt, and talk about border options with her.  The body of the quilt is all complete now, but she was waiting to hear what I thought about her border choice.  I liked the piece of fabric she had chosen, but suggested she use a different part of the fabric and keep it lighter rather than darker and heavier looking. 

This is what we agreed on.

Of course she will have to buy more fabric now to mitre the corners, but isn't that always the way!


Mum helped me out by darning in the ends on my scarf.  It's not finished yet, but it was a huge help to get those ends darned in because it's a very long scarf.  The weather has certainly turned colder and I'd like to be wearing it now. 


 I went to All Things Bernina at Westgate and bought a few bright Anna Maria Horner prints there.  I do love that lime green colour. 
 
Mum's garden in winter.  It's rains a lot in Auckland in winter.

The view from the Krispy Kreme Donut shop

Graduation Pikachu 


Now it's time for the Peacock Party.  Feel free to share a link to a recent blog post below.  Thank you to everyone who continues to link up.

You are invited to the Inlinkz link party!
Click here to enter

Saturday, 1 June 2019

Portraits Quilt for Anna Maria Horner - Part 1

You may remember that I was so excited when Anna Maria Horner asked if I'd like to make her Portraits Quilt to help showcase the fabrics in Chapter 2 of Conservatory Fabrics.   You can read more about that in my earlier blog post here.

Here are some progress photos, and some tips and tricks if you'd like to make this quilt. Patterns and kits are available from shops that stock Anna Maria Horner's fabrics.

1. The central Dresden Plate block.  

I love it! This is going to make a very dramatic central block in the quilt.


I taped the template onto my ruler

I made a plastic template for the wedges and was very careful with how I cut the Dresden Lace fabric.  The teal pieces look great when they are fussy cut.


I chose to hand applique my Dresden Plate onto the background fabrics, but you could use any method of applique. I ran a tacking thread around the centre to hold the fins in place before I machine appliqued the central motif on.


The fussy cut central circle.  

2. The large outer blocks.


2.1  Cutting large blocks on point.  

The pattern requires 4 large blocks from the "Beautiful Mushrooms" print.  


I thought I had it all under control, but then I accidentally picked up my 12.5" ruler and cut the block too small!


Fortunately I could pattern match two pieces and recover from that mistake, but it made me quite nervous about cutting the "On My Way" fabric into 12 large blocks.  So, I did lots of planning on paper first.  I also used the blocks I'd already cut from the "Beautiful Mushrooms" to help with planning.


I even tested out my cutting on pieces of paper!


Once I had cut the diagonal strips, I could decide where to make the opposite cuts to get a good mix of motifs in my blocks, and centre flowers, birds, people where possible.


I do like a challenge, but I must admit that I breathed a sigh of relief when I had all 12 blocks cut out.

2.2 Making and applying the crescents

When I first saw the Portraits quilt pattern I thought that the large blocks would require curved piecing.  However, when I read the instructions I realised the crescents are appliqued on.  I haven't done a lot of raw edge machine applique, but I upskilled quickly.  It's quite easy if you use Vlisofix and keep your machine speed very slow.


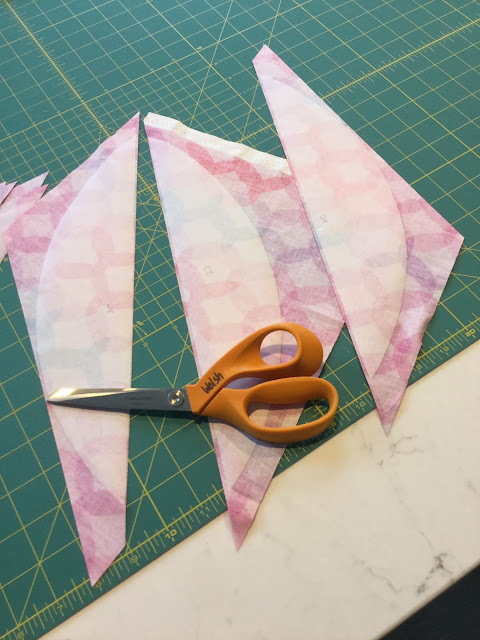
I made a plastic template for the crescents and traced around it onto the Vlisofix.  Because I chose to use raw edge applique, I removed the seam allowance on the curved side, but retained it on the straight side.  I cut out each Vlisofix crescent and laid them on the bias of the fabric - as per the pattern.


After I'd ironed the Vlisofix crescents onto the fabric, I sliced the pieces apart with my rotary cutter, and then cut around the curved edges with scissors.


Before I applied any crescents to the "On My Way" blocks, I was very careful to get the direction of the prints on the blocks correct. I laid out all 12 blocks on my bench, ensuring I had a good spread of the motifs in the fabric. 


I then fused the "Bokeh" crescents on to the correct edge of all 12 pieces on "On My Way" before I fused on any of the "Tokyo Dreams" crescents. That saved me from getting any blocks up the wrong way.

Bokeh - iron one of these pieces to each of the 12 blocks FIRST

Then add 3 crescents of Bokeh to each of the 12 blocks

I then machine appliqued the crescents on to the blocks using blanket stitch 1329 on my Bernina. I used the open toe foot. I set the stitch width to 3 and the stitch length to 3. I positioned the need to the far right, and lowered the pressure to 25.  I also set the stop needle position to the right. 


3. The inner blocks

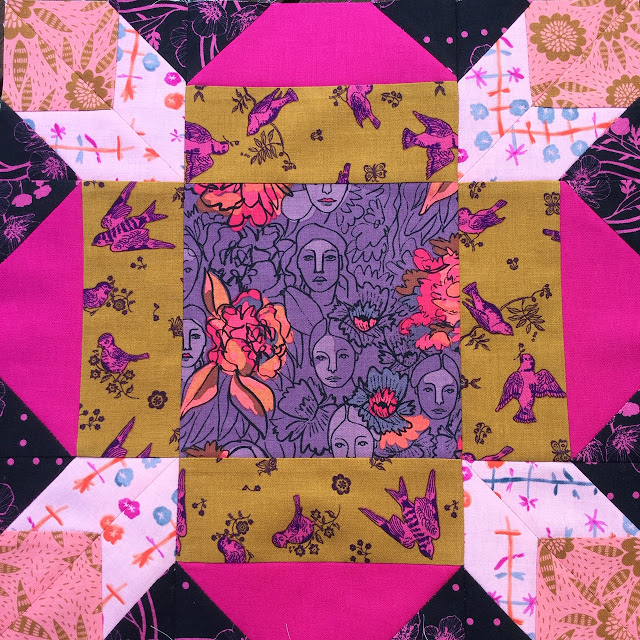
Aren't these so pretty! I love how these fabrics work so well together.  


The corners on these blocks are a little bit tricky.  I thought I could get away without making the plastic templates, but life became easier when I gave in and made the templates.  I'll talk more about these blocks in a future post.

4.  The side setting triangles

I'll also talk more about the side setting triangles in a future post, but suffice to say that I fussy cut the Propagate fabric and it looks great.


So, that's where I'm up to with the Portraits quilt.  If you have any questions feel free to email me.

Here's a list of where Anna Maria Horner will be teaching in NZ.Hosted by Fabco, Anna Maria will be teaching and lecturing around New Zealand for the first time. Contact the following shops to book your time with her! The shops are starting to release details of the lectures and classes now.

November 19-20 - All Things Patchwork, Auckland
November 21- Cottage Flair, Rotorua
November 22-23- Donna’s Quilt Studio, Hamilton
November 25-26- Busy Bee, Wellington
November 27-28- Quilter’s Lane, Masterton
November 29-30- Quilting Shed, Oamaru