Pages

Friday, 1 November 2024

Lollie Wheels

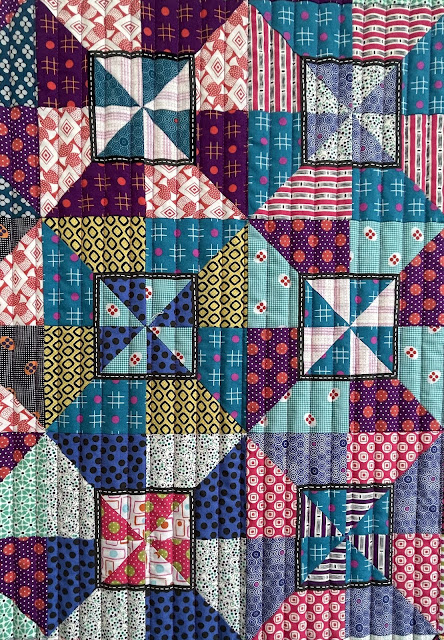
This week I decided to start something new.  I saw a cute quilt in the background of Jen Kingwell's booth at Quilt Market and I thought about some of her fabrics that I had in my stash.  


This clever version of a Pin Wheel quilt is made by cutting Jen Kingwell's Lollies fabric in a particular manner. Jen offers a free pattern to make in on her Amitie Textiles website - it's called Lollie Wheels. Fortunately I had a few pieces of the first run of Lollies in my stash so I decided to give it a try. 
 

width of fabric of Lollies


More of the colourways that I just happened to have


I was very pleased with my first blocks so I kept going and now I'm on a roll.  


Maybe I'll be able to report back next week with even more progress.  The blocks are 8" finished so I'm aiming for 49 of them to make the quilt 56" x 56" as per the pattern. 


Friday, 11 October 2024

Symposium recap - my class with Pride and Joy Quilting

I'm home from Symposium and I'm so glad that I decided to go.  I really would have had FOMO (Fear Of Missing Out) if I'd stayed at home.  

Here's what I've made:


I took a 3 day class with Veruschka Zarate of Pride and Joy Quilting and it was great.  We worked on the New Zealand image from her Capturing Memories Landscape Quilt Pattern Series. This is one flat quilt designed to look like two Polaroids laid on top of each other.  You can't see the quilt underneath because it's doesn't exist!

Veruschka developed the idea of creating scenes for the locations she teaches in - so there's a Sydney quilt because she taught at the Bernina Academy in Sydney before she came to New Zealand, and there's a Scotland scene because she's going there next. 

Here's a link to a California scene because the New Zealand one hasn't been uploaded to her website yet - but it will be very soon.  


There were only 9 people in the class so we had 2 tables each and plenty of room to spread out.  There were 18 people in the previous 2 day class so that must have been very cramped. We paid more because it was 3 days, but we had more room and an extra day to really lock in all that Veruschka taught us.  

At Symposium we can hire brand new machines from Bernina NZ and they sell them off at reduced prices after Symposium


This is how far I got after 3 days.


I've worked on my piece on Tuesday, Wednesday, Thursday and Friday since I got home, and the top is now finished.  

I think I'll machine quilt this one myself because it's only 27" x 27".


Veruschka shared so much about her quilting processes - from designing the images, to choosing the fabrics and threads, to quilting it on her long arm and even the backing.  It was great to just work away on our own pieces and listen to all of her useful information at the same time.  

Her amazing "Girl With A Pearl Earring" quilt hung on the wall at the back of our classroom so we all got to examine it close up. I see that the PDF pattern costs NZD 64, but I'm sure it's worth every cent because Veruschka's patterns are written to a very high standard.  

The Girl with the Pearl Earing by Veruschka Zarate


During one of the lunch breaks some of the other overseas tutors came to visit:

Veruschka Zarate (@prideandjoyquilting), Rachelle Denneny (@rachelledennenydesigns)
 Jemima Flint (@talesofcloth), Luke Haynes (@entropies), Nicole Leth (@myaffirmationproject)


Overall, it was a great class and I'm very glad that I went to Symposium.  Thank you Helen for allowing me to stay at your house. 


Friday, 27 September 2024

Quilt Symposium 2024

This time next week I'll be at Quilt Symposium 2024 in Cambridge, New Zealand (near Hamilton in the Waikato). Our Symposiums happen every two or three years and are big five day events for quilters.  It includes five days of classes, exhibitions, giant vendors mall, gala dinners, prizes, entertainment...everything!

My decision to go was a bit of a last minute one once my annual work conference was over and I actually felt that I could think about the rest of 2024.  The programme came out and I could see that there were still spaces in a class with an American tutor, Veruschka Zarate of Pride and Joy Quilting. She had designed a unique New Zealand piece and would be teaching it at the Symposium.  So I thought why not! 


I have a quilty friend who lives in Cambridge so I'm going to stay with her.   I won't be there for the full five days, just Friday, Saturday and Sunday.  

The start of Spring always reminds me of the previous Symposiums I've been to:

2017 in Christchurch.

I had a quilt in the exhibition there and attended classes with Jen Kingwell, Chris Jurd and Deborah Louie. 

Vibrant Curiosities in Christchurch 2017


The start of my Glitter in Green quilt 


Glitter in Green - designed by Jen Kingwell

2019 in Auckland. 

I attended classes with Margaret Sampson-George and Wendy Whellum. 

The class with Margaret Sampson-George was so much fun, but I haven't finished my piece from that class. 

Dodecagon class with Margaret Sampson-George


So much inspiration in Margaret Sampson-George's class


Hand piecing with Wendy Whellum


2022 in Lower Hutt

I entered the quilt that I had started with Wendy Whellum at the last symposium into the exhibition, taught some classes myself and attended a class with Lorena Uriate. 

Neptune and the Mermaid - designed by Wendy Whellum


Me teaching Millefiori Quilts


Kawandi taught by Lorena Uriate


So you can see that Symposium is pretty full on.  But it's going to be great and I'm looking forward to it. Will I see you there? 

Friday, 6 September 2024

Baby Quilts x 3

A few weeks ago my niece had a baby girl.  So of course I just had to make a quilt for the new baby.  


I decided to cut into a special piece of fabric I'd bought two years ago at our Symposium in Lower Hutt.  It was 

Homeward by Monika Forsberg for Anna Maria Horner Conservatory by Freespirit Fabrics.


But I didn't really do the maths first and I ended up with left over squares.  So I decided to make a little dolly quilt for the baby's almost two year old big sister. 


But then I still had more feature blocks left over, so I made a whole new quilt for the big sister.  


So what started out as one quilt for a new baby, ended up as three quilts for both girls and a dolly.


They have received them now and are thrilled with them.  The dolly quilt has had a lot of use already.  

Friday, 9 August 2024

Kokomo (Stars Upon Satrs) Planning the colours

This is Part B of a series of posts explaining how I make my version of Stars Upon Stars.  

B. Planning the colours

 1. External stars in the blocks. 

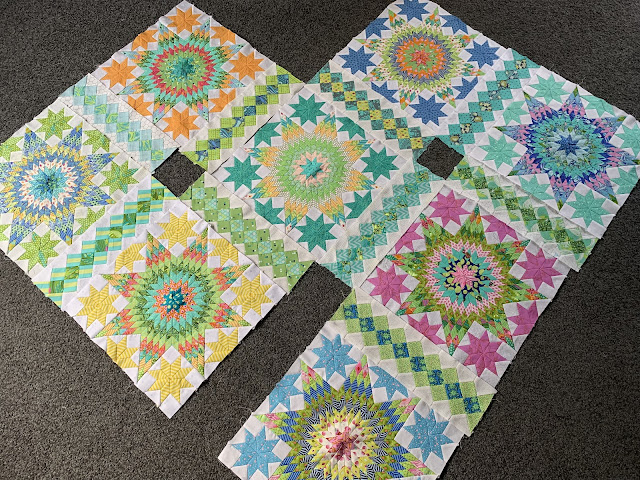
A key design feature of the original Stars Upon Stars quilt is that each block is unique.  I decided replicate that idea by using different fabrics and colours for the external stars of each block. I opted for tone on tone fabrics in most cases, and tried to use every colour within my limited colour range - blue, aqua, green, pink, orange and yellow.  If I repeated a colour I used a different fabric which was always slightly darker or lighter than the previous block.

Sometimes I made the external stars before I had even selected the fabrics for the main stars. 


2. Sashing strips.

I decided to limit my sashing strips to blues and aquas.  I wanted variety in my sashings, but I didn't want them to be the first thing people saw when they looked at my quilt.  They needed to blend into the background and quietly emphasise the tropical lagoon look of my quilt.


3. Sashing stars.

I knew that I wanted my sashing stars to all to be the same colour, but I couldn't decide whether to make them green or navy.  I made up some green stars before I settled on navy. I like the navy because it makes the sashing stars the darkest element in the quilt, and they are very crisp against the white background. 


4. Background.

You'll be able to see from these close up photos that I didn't just use white for the background.  I used a wide range of low volume fabrics.  The background fabric is consistent throughout each block or sashing strip, and each of the sashing stars have the same background too. 


5.  Main stars

Each main star requires nine different fabrics.  I decided the overall colour of the star before I started pulling fabrics.  If I wanted a green star I would ask myself, "Green and what?".  I didn't think there would be enough variety within a star if I just used nine shade of green.  So, green and yellow? green and pink? green and orange? 

I tended to start my planning by deciding rows 4, 5 and 6 first.  These are the rows with the most diamonds and therefore the rows we see the most of.  I didn't want the 5th row to be the most dominant in all blocks so sometimes I moved the stronger fabrics to rows 3, 4 or 6.  

Sometimes I put similar colours next to each other to show a progression within the block. 

I deliberately avoided using the fabric of the external stars in the main star because that would have instantly made it the most dominant fabric in the block.  The external stars are designed to elevate the main star.  

Once I'd chosen my fabrics for a block I would leave them on my table for a day or two until I was really happy with them and ready to cut. 
  

The lime green in row 3 is the most dominant here, closely followed by the hot pink in row 4.


The dusky pink in row 4 is the most dominant here.


The lime green in row 3 and green stripe in row 6 are dominant in this block.


6. Block assembly
Once I had finished sewing each of the 8 diamond shaped star points, I tested out both layout options for the external stars before I sewed the star together. (with row 1 in the centre of with row 9 in the centre). It's amazing how different fabrics become dominant depending on what else is surrounding them.  

The diamonds are reversable and can change the whole look of a block.


7. Binding

My final fabric decision was the binding.  I knew I wanted it to just merge into the quilt and not stand out.  I considered using one of the aqua prints already in the quilt, but I had to be sure that none of the blocks touching the binding and that fabric in them.  

In the end I used something similar, but not already in my quilt - Tula Pink's True Colors Tiny Dot in Peacock.  How appropriate for me!!


Friday, 26 July 2024

Crazy Cutting Corners

I'm back! 

I haven't been away, but I've been super busy with work, cricket admin and quilt guild admin.  I've hardly had any time for sewing lately, but I decided to fix that this week and I finally made time to pick up my rotary cutter.  


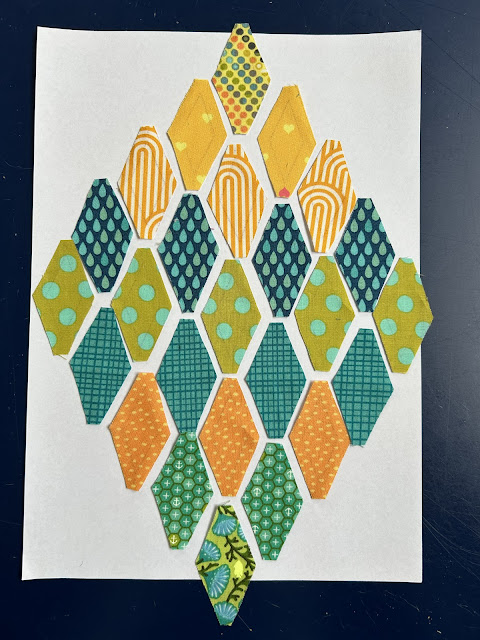
I'd been thinking about using some of my Kaffe Fassett stripes so I browsed through some of my older Kaffe books and came upon this pattern from Kaffe Quilts Again (2012):


I only had the Marquee fabric in the lighter shades so mine looked like this:

random


some diamonds forming


Diamonds!


and even more diamonds


I'm going to add a pieced border, but I don't have much of the Marquee stripe left so I'll have to use something else.  I'll be sure to post another photo when I've got the top together.  


Friday, 5 July 2024

Kokomo (Stars Upon Stars) Fabric Selection

Thank you for all the lovely comments on my Kokomo quilt.  As promised I'm going to explain more about how I made it - both for anyone thinking about making one themselves, and for my personal record, because after all, that's what blogs are for.

A. Fabric selection

I loved Tula Pink's Zuma range as soon as I saw it and I knew I wanted to use it for something special so I decided to use it for my version of Stars Upon Stars - Kokomo.  As soon as the block started coming together I knew I had made the right decision for me.


Most people who make Stars Upon Stars quilts use traditional colourways.  The pattern is inspired by an antique quilt from the collection at the Grand Rapids Public Museum in USA so it's not surprising many people recreate that look with traditional fabrics.

But traditional colours have never appealed to me, and I could picture Stars Upon Stars in modern colours.  So I decided to go with blues and greens with accents of pink, orange and yellow.  


When I work on long term quilts like this I select a range of fabrics that match my vision for the quilt and move them into a different storage container. Then I just pull from that curated range as I select the fabrics for each block.  I find that this method stops me straying too far from my original vision. 


When I'm working from a limited range of fabrics I become very aware of the subtle colour differences between the fabrics.  My greens merged into teals and then into blues.  But that's fine because I love them all.  

If I needed more of a particular colour I would take some of my fabrics to the shop with me to ensure I didn't drift too far away from my colour scheme. 


In the end it's all worked out well and there's not a single block that I would change.